
If you've mastered the Jedi profession by reaching Combat Level 90 and you're wondering "What do I do now?" Community member Everitt_Cage has an answer! Check out this great guide that will help you take role-playing Jedi Master/Padawan apprenticeships in-game to a new level.
So, you've reached Combat Level 90 and mastered the Jedi profession. "What do I do now?" you ask? Now, you become a real Master.
Merely reaching CL 90 does not mean a player is a Jedi or Sith (R-P) "Master", it merely gives them the formal greeting of "Master Jedi", which was given to both Padawans (Anakin in EP II) and Knights (Obi-Wan in EP II). Once a Jedi reaches CL 90, all they have achieved is Knighthood. To become a Master they then must then take an Apprentice...
Part I: Taking an Apprentice
Jedi Apprenticeships
- A CL 90 Jedi will select a willing Jedi of a lesser CL to be his future Padawan.
- The future Master will instruct his future Padawan to travel to a force shrine to meditate and listen to the will of the Force (for an amount of time determined by the future Master).
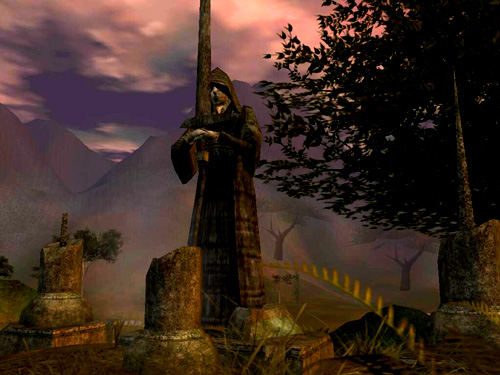
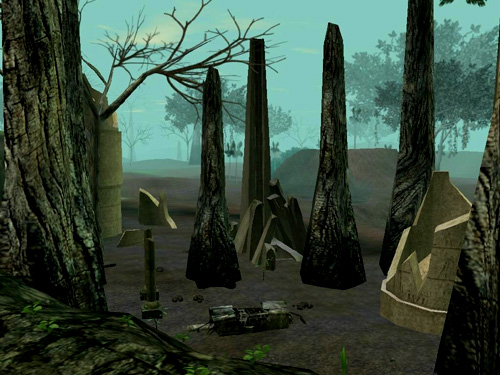
- Afterwards, the future Master and Padawan will travel together to the ruins of the ancient Jedi Temple on Dantooine:
- Once there, the Master will instruct the Padawan to kneel and recite the Jedi code:
"There is no emotion, there is peace"
"There is no ignorance, there is knowledge"
"There is no passion, there is serenity"
"There is no chaos, there is harmony"
"There is no death, there is the Force" - Now the Master will ask the Padawan if he is willing to dedicate their "life" to the will of the Force, the protection of others, and the guidance of his or her Master.
- If the Padawan agrees, the Master instructs their student to rise and declares him his Padawan.
- The final step is for the Master to put the following at the bottom of his bio: "Jedi Padawan: (padawan's name)", and for the Padawan to put the following at the bottom of his bio: "Jedi Master: (master's name)".
Sith Apprenticeships
- A CL 90 Sith (RP) will select a willing Sith (RP) of a lesser Combat Level to be his Apprentice.
- The future Master will instruct his future Apprentice to travel to a force shrine to meditate on his hatred and anger, and the power which only the dark side of the Force can bring him (for an amount of time determined by the future Master).

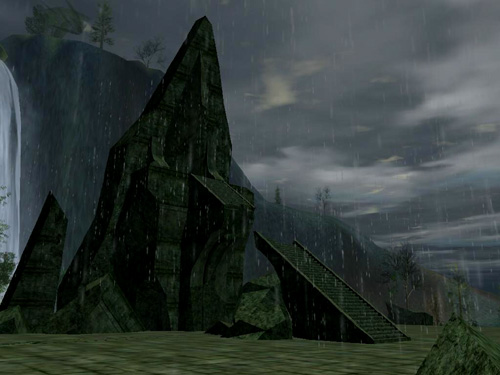
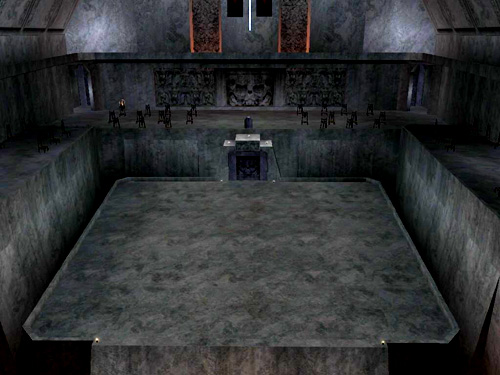
- The future Master and Apprentice will then travel together to the temple of the ancient Sith Lord Exar Kun on Yavin IV:
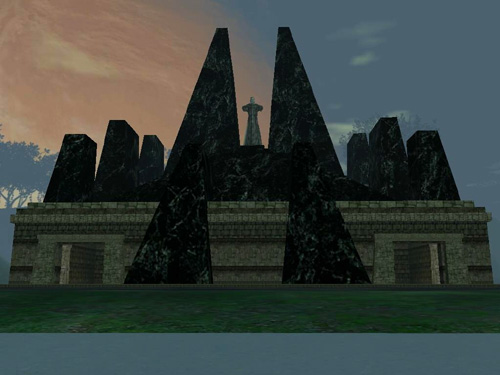
- Once there, the future Master will stand between the two black triangles (with the statue of Exar Kun over him) and order the Apprentice to kneel before him and recite the Sith code:
"Peace is a lie, there is only passion"
"Through passion, I gain strength"
"Through strength, I gain power"
"Through power, I gain victory"
"Through victory, my chains are broken"
"The Force shall free me" - Now the future Master will ask the Apprentice if he is ready to dedicate their "life" to the pursuit of power, the domination of others and the orders of his or her Master.
- If the future Apprentice agrees, the future Master bestows upon them a Sith title, instructs them to rise and declares them as their Apprentice.
- The final step is for the Master to put the following at the bottom of their bio: "Sith Apprentice: (apprentice's name)", and for the Apprentice to put the following at the bottom of his or her bio: "Sith Master: (master's name)".
* A very nice alternative location for the Sith naming ceremony is the Shore of Remorse, found on Mustafar:

However, you will have to have the Trials of Obi-Wan expansion to travel to Mustafar. If you can't get to Mustafar, everyone can travel to the Temple of Exar Kun on Yavin IV, for a naming ceremony.
Part II: Training your Apprentice
The Master: The Master's role in the system is to help their apprentice advance. This advancement comes in three main ways:
- Helping them gain experience points (XP) to increase their Combat Level.
- Helping them acquire the resources and components to construct a more powerful lightsaber as they become certified.
- Helping them find better robes when they are able to wear them.
The Student: The Padawan or Apprentice's role in the system is two-fold:
- A Padawan or Apprentice should be very respectful of their Master, who is helping them grow as a Jedi.
- A Padawan or Apprentice should try their best to meet any advancement goals their Master sets for them to achieve.
Advancement Goals: A Teacher would expectedly set goals for his student (which would vary for everyone, depending on their real life circumstances), though a Jedi Master would not belittle or demean his Padawan if they did not advance as quickly as the Master expects, instead showing patience and understanding. A Sith Master, however, would be far less forgiving of a slow learner.
Purpose: The main purpose of the Master/Apprentice System is for the mutual enjoyment and benefit of both the Master and the Apprentice. The Apprentice benefits from the system by having a more experienced player helping them whenever they need it. The Master benefits from the system in that only by successfully training a Padawan or Apprentice to Knighthood can they become a true Jedi or Sith Master.
Part III: "Graduation"
Jedi Graduations
- Once a Padawan has reached CL 90, the Master assigns 3 trials, which must completed alone to prove themselves a Jedi Knight (Below are explanations of the 3 types of trials with pictures that represent them, as well as a recommended example):
- Trial I - Keeping the Peace : "For a thousand generations the Jedi Knights were the guardians of peace and justice in the old Republic..."
Keeping the peace involves dealing with seedy characters or dangerous creatures that are a cause of harm to the innocent citizens of the galaxy:
Example: Krayt Dragons are some of the most fearsome creatures in the galaxy. Recent reports from Tatooine indicate that of late their population has increased sharply, and is proving a deadly threat to innocent moisture farmers and travelers of the desert world.
The Galactic Travel Organization has requested the help of the Jedi order, on behalf of their Tatooine branch, in thinning the sudden boom in the Krayt Dragon population. The Padawan must travel to the Krayt Dragon graveyard on Tatooine and kill 10 Krayt Dragons to help maintain the safety of the locals.
- Trial II - Expanding the Archives: As was seen in Attack of the Clones, a Jedi will try to find information on something in the Jedi archives from time to time and it will not be there. When this happens, the only way to solve that problem is to send someone to gather information about what is missing and why:

- Trial III - Bringing Balance to the Force: On many different planets, there are beings who have discovered the Force or started using the Force in unnatural ways (the Dark side). What they are doing is causing an imbalance in the force which is left to the Jedi Order to correct:
Example: The Jedi archives lack sufficient data regarding the area known as the Ryatt Trail on the planet of Kashyyyk. It is known that this trail spans an area ranging from the tree-top canopy all the way to the floor of the forest, but more detailed information requires an expedition team be sent to explore this area on foot.
The Padawan must travel to Kashyyyk and explore the trail from the entrance gate to the end on the forest floor so that the Jedi archives can be updated with more detailed information regarding the area.
Along the way, the Padawan should deal with any hostile creatures that might prove a danger to themselves or the locals (notably the Katarn).

- After the Padawan has completed his trials, the final step is for the Master to change his bio from: "Jedi Padawan: (padawan's name)" to "Padawan trained: (padawan's name)", and the Padawan to change his bio from "Jedi Master: (master's name)" to "Former Jedi Master: (master's name)".
Example: Home to a group of evil force wielding witches who call themselves the Nightsisters, the Nightsister stronghold has become one of the most powerful focal points of the dark side in the entire galaxy.
Until the Nightsisters are dealt with, the very existence of the light side of the force is threatened, prompting the Jedi order to mount an operation to destroy them. The Padawan must journey to the Nightsister stronghold and clear out the Nightsisters from their stronghold and its neighboring cave so that the force can be brought back to balance.

Sith Graduations
- Once the Apprentice has reached CL 90, the Master will give him 3 Tests of Power, which the Apprentice must complete alone, to determine if he is strong enough to be a Sith (Below are three recommended examples for the Tests of Power):
- Test I - Dragon Slayer: Making the Jundland Wastes all the more dangerous are immense reptiles stalking the craggy canyons in search of prey. These huge predators are known as Krayt dragons and their bone-chilling howl is enough to send even ferocious Sand People skittering for cover...but not a Sith.

- For his first test, the Apprentice must travel to the desert world of Tatooine and slay 15 Krayt Dragons.
Test II - Search and Destroy: "My Lord, it's impossible to locate the ship. It's out of our range." "Not for a Sith..."
For his second test, the Apprentice must travel to the Forrest world of Endor, and then find and defeat a Gorax giant.
Test III - Killing Spree: A Sith's true power is only achieved through testing the limits of their anger. To do this, a Sith must unleash their anger on all who stand in their way.

For the third test, the Apprentice must travel to the Jungle world of Yavin IV and kill the fearsome Acklay inside the Geonosian labs, killing all Geonosians and droids along the way.

- After the Apprentice has completed the 3 Tests of Power, the Master will instruct his Apprentice to follow him to the ancient Dark Jedi enclave (also on Yavin IV), for a final lesson:
After they have arrived, the Master and the Apprentice will make their way into the inner chamber:
The Master now informs the Apprentice that the time has come for him to prove himself a Sith Lord, and challenges him to a duel to the death.
- If the Apprentice defeats their Master, the Master becomes one with the Force (clones) and /tells his Apprentice that their training is complete. They are now a Sith.
- The final step is for the Master to change his bio from: "Sith Apprentice: (apprentice's name)" to "Apprentice trained: (apprentice's name)", and the Apprentice to change his bio from "Sith Master: (master's name)" to "Former Sith Master: (master's name)"
Have you "Graduated"?
If you are a Combat Level 90 Jedi or Sith, make sure you have done the 3 Jedi Trials or Tests of Power set forth by your Master before taking on a Padawan or Apprentice of your own! Henceforth, when you look at the bios of your fellow Jedi, you will know that they have achieved a true level of distinction by carrying on the tradition of either the Jedi or the Sith.
May the Force be with you!
!!! Jedi can wear armor now (@CL22) !!!
Friday Feature - 04/18/2008

"A Jedi's strength flows from the Force." - Yoda
The expertise system gives Jedi a choice of the path they wish to follow in the universe of Star Wars Galaxies. Choose a side and your role as a Jedi with the Path tree in the expertise system, now with several new abilities added in Game Update 3.
Choose Your Path
The left side of the Path expertise tree represents the light side of the Force and the right side of the tree embodies the dark side. The light side centers on calm and forethought to improve defensive capabilities, while the fury and passion of the dark side focuses on offensive powers.

A Jedi stance is required for abilities on the left side of the tree, and a Jedi focus is required to use the abilities on the right side of the tree.
Jedi who are not completely taken over by one side or the other may still choose abilities of both sides. Although Jedi are free to choose between the two sides of the Force, abilities and passive bonuses cannot be used while in the opposite stance or focus.
Light Side of the Force
Through careful meditation and study of the light side of the Force, a Jedi can slow down enemies, increase damage and lightsaber skills, support his or her allies, and more.

 Cautious Nature: When using a Jedi stance, Constitution increased by 10 per point spent, and Glancing Blow is increased by 1% per point spent.
There are no requirements for learning this expertise.
Saber Shackle: Saber Shackle adds a 25% chance per point spent to snare and a 2% chance per point spent to root a target with Saber Throw while in a stance.
You must train four points in Path and four points in Cautious Nature to add this expertise.
Reactive Response: Each damaging strike on the Jedi increases that Jedi's action by 2% per point spent when using a Jedi stance.
You must spend eight points in Path and four points in Saber Shackle to add this bonus.
Force Clarity: Adds a 5% chance to strike twice with a lightsaber.
You must have invested twelve points in Path and two points in Reactive Response to add this bonus.
Anticipate Aggression: All damage dealt to Jedi reduced by 4% per point spent when using a Jedi stance.
You must have sixteen points in Path and one point in Force Clarity to train this expertise.
Riposte: A maneuver that has a 25% chance per point spent to counterattack a melee or ranged attack when an opponent misses within a 5m range. It can only be performed while in a stance.
Eight points in Path and four points in Cautious Nature are required to learn how to riposte.
Saber Reflect: A defensive state of mind that allows for reflecting melee and ranged attacks partially back on the attacker when parried within a 64m range. It can only be performed in a stance.
You must have invested twelve points in Path and two points in Riposte to train in Saber Reflect.

Improved Saber Reflect: Increases Saber Reflect damage by 33% per point spent as well as a 16% chance per point for Force Alacrity to activate. It can only be performed in a stance.
A skilled Jedi with sixteen points in Path and one point in Saber Reflect can train this ability.
Perceptive Sentinel: Increases critical hit defense by 1% per point spent and an additional 1% critical hit defense for PvP per point spent. It can only be performed in a stance.
Four points in Path and four points in Cautious Nature are required for a Jedi to learn this expertise.
Forsake Fear: For 10 seconds, the Jedi and all members of the Jedi's party regenerate an extra 6% of their action per second. Combat damage does not interrupt this meditative state.
You must spend eight points in Path and four points in Perceptive Sentinel to train this skill.
Hermetic Touch: Self heals gain the ability to cure and temporarily become immune to all damage over time attacks when using a Jedi stance.
Twelve points in Path and one point in Forsake Fear are required to learn this ability.
Soothing Aura: Self heals are increased by 25% per point spent when using a Jedi stance.
You must invest sixteen points in Path and one point in Hermetic Touch to learn this expertise.
Jedi Mind Trick
Jedi of both the light side and the dark side can exert their control on the weak-willed through the Jedi Mind Trick and the Cloud Minds line of expertise.
 Cloud Minds: Grants the ability to use Mind Trick. Mind Trick briefly confuses opponents in the area and they no longer see the Jedi as a threat.
You must spend eight points in Path to be able to learn the Jedi Mind Trick.
Expansive Trickery: Increases the radius for Cloud Minds by two meters per point spent.
Twelve points in Path and one point in Cloud Minds are required to train this expertise.
Lethargy: The duration of Mind Trick and Cloud Mind debuffs are increased by two seconds for every point spent.
You must invest sixteen points in Path and three points in Expansive Trickery to learn this skill.
Dark Side of the Force
A Jedi ruled by passion can embrace the power of the dark side to wield Force lightning, drain health from opponents, increase the damage he or she inflicts, and more.

 Remorseless Nature: Stamina is increased by 10 per point spent when using a Jedi focus.
There are no requirements to learn this expertise.
Brutality: Critical strikes are increased by 1% per point spent when using a Jedi focus.
Four points in Path and four points in Remorseless Nature are required for this expertise.
Dark Lightning: Grants the ability to use Dark Lightning attacks. Force Shock channels the Force into an electric shock that sends electricity burning through your opponent.
You must train eight points in Path and four points in Brutality to wield Dark Lightning.

Maelstrom: Grants the ability to use Maelstrom attacks, which are a cone effect lightning attack.
You must spend twelve points in Path and one point in Dark Lightning to learn this ability.
Wracking Energy: Increases Force Lightning, Force Maelstrom, and Force Drain armor penetration by 25% per point spent. Adds a snare to Force Lightning and increases duration of the snare by two seconds per point spent.
You must invest sixteen points in Path and one point in Maelstrom.
Tempt Hatred: A Jedi gains 2% of action (per point spent) from damage by tempting hatred in an opponent while in a focus.
Eight points in Path and four points in Remorseless nature are necessary for learning this ability.
Force Drain: Allows a Jedi to gain the ability to drain health from opponents while in a Jedi focus. This attack cannot be parried.
You must spend twelve points in Path and two points in Tempt Hatred to train this ability.
Improved Force Drain: Improves the health returned on a successful Force Drain by 33% per point spent.
Sixteen points spent in Path and one point in Force Drain are required for this expertise.
Ruthless Precision: Allows cruel, calculated strikes to increase damage by 2% (per point spent) to an opponent while in a focus.
Four points in Path and four points in Remorseless Nature are the prerequisites for this expertise.
Force Choke: Grants the ability to use Force Choke attacks.
You must spend eight points in Path and four points in Ruthless Precision to learn this ability.
Improved Force Choke: Force Choke's damage is increased by 10% per point spent and Force Choke's damage over time component is increased by 10% per point spent.
Twelve points in Path and one in Force Choke are required to train this skill.
Strangulation: Reduces a target's damage output by 5% per point while under the effects of Strangulation.
You must invest sixteen points in Path and two points in Improved Force Choke to learn this ability.
In Game Update 3, expertise points for Jedi will be cleared and you begin with a blank slate. Your decisions and the path you choose will determine your fate in the galaxy!
Guide to Lightsaber Color Crystal Elemental Damage
The Lightsaber is "an elegant weapon, for a more civilized age".
However, it is hard to get such a lightsaber to work properly, as the beam of light needs to be properly focused to create a stable blade of light that will allow the Jedi to defend oneself and others. Force Crystals are used to focus the blade of the lightsaber. The Jedi has to meditate and infuse them in the Force to tune them to themselves. Only if the crystal is properly tuned to the Jedi and noone else, it will be able to produce the lightsaber blade. Not only do these crystals give the lightsaber's blade it's distinct shape and color, but some of them also said to modify the damage inflicted by the lightsaber through the Force that flows through the elements contained within. The Lightsaber's Elemental Damage Value is determined by the Color Crystal. The elemental damage value is a certain percentage of the total maximum damage value of the Lightsaber and power crystals / pearls.
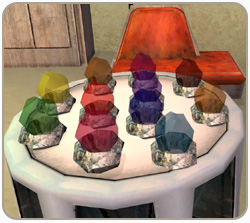
The following are the Color Crystals that can be found in the Galaxy:
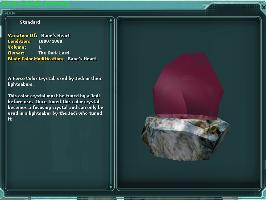
Regular Color Crystals
Elemental Damage Value: 2% of the Lightsaber's Maximum Damage Value
Elemental Damage Type:
- Cold (Blue-Dark Blue)
- Heat (Red-Dark Red-Orange-Brown)
- Cold (Yellow-Dark Yellow)
- Acid (Green-Dark Green)
- Electricity (Purple-Dark Purple)
Critical Procedural Effect: Increases the amount of damage taken by the target for a duration of six seconds
Means to obtain: Loot from all kinds of NPCs all over the Galaxy.
POWERCRYSTAL: Increase the damage output of a Lightsaber. Can be looted of NPCs all over the Galaxy, in diffenet qualities...POOR/FAIR/GOOD/QUALTITY/SELECT/PREMIUM/FLAWLESS.
 Bane's Heart
Elemental Damage Value: 4% of the Lightsaber's Maximum Damage Value
Elemental Damage Type: Electricity
Critical Procedural Effect: Increases glancing blow chance
Blade Color: Pinkish-Red
Means to obtain: Loot from NK-Necrosis on Kashyyyk
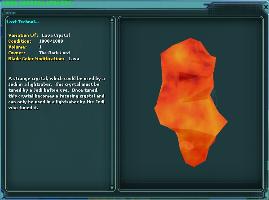 Lava Crystal
Elemental Damage Value: 4% of the Lightsaber's Maximum Damage Value
Elemental Damage Type: Heat
Critical Procedural Effect: 5 second Fire damage over time effec
Blade Color: Lava
Means to obtain: Made with the Chu-Gon Dar Cube (combination: Warmly Glowing Artifact-Warmly Glowing Engine Component-Warmly Glowing Skull)
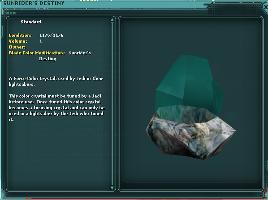 Sunrider's Destiny
Elemental Damage Value: 4% of the Lightsaber's Maximum Damage Value
Elemental Damage Type: Heat
Critical Procedural Effect: 5 second Fire damage over time effect
Blade Color: Teal
Means to obtain: Reward for completing a now defunct quest in the Village of Aurilia. The Quest no longer exists and the reward for completing it can no longer be obtained. There is a slight chance that you can obtain an untuned version of this crystal from another player.
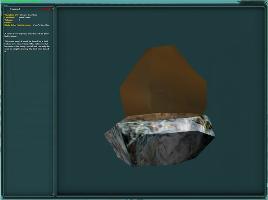 B'nar's Sacrifice
Elemental Damage Value: 5% of the Lightsaber's Maximum Damage Value
Elemental Damage Type: Acid
Critical Procedural Effect: Increases Critical Hit Chance
Blade Color : Brownish
Special Flag: No Trade
Means to obtain: Reward for completing the Jedi Pilgrimmage quest. Quest will be granted to Elder Jedi Only.
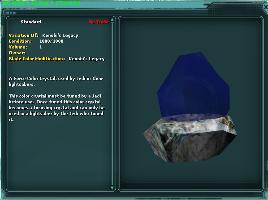 Kenobi's Legacy
Elemental Damage Value: 5% of the Lightsaber's Maximum Damage Value
Elemental Damage Type: Cold
Critical Procedural Effect: Increases the amount of damage taken by the target for a duration of six seconds*
Blade Color: Blue
Special Flag: No Trade
Means to obtain: Reward for completing the Jedi Pilgrimmage quest. Quest will be granted to Elder Jedi Only.
 Windu's Guile
Elemental Damage Value: 6% of the Lightsaber's Maximum Damage Value
Elemental Damage Type: Cold
Critical Procedural Effect: Increases the amount of damage taken by the target for a duration of six seconds*
Blade Color: Violet
Special Flag: No Trade
Means to obtain: On sale at the factional recruiter, only for Rebel and Imperial Generals. The credit cost is determined by the current planetary possession on the planet the recruiter is located on.
* The potency of the debuff is modified by the value of the elemental cold damage of the application weapon and the weapon speed of each individual attacker. The debuff modifies base weapon damage.
OTHER LIGHTSABER CRYSTALS (existance/obtainance are unknown):
- Maul's Vengence
- Kun's Blood
- Bondara's Folly
- Ulic's Redemption
- Gallia's Intuition
- Prowess of Plo Koon
- Mundi's Response
- Strength of Luminaria
- Baas's Wisdom
- Quintessence of the Force
- Dawn of Dagobah
- Horn's Future
- Qui-gon's Devotion
- Kit's Ferocity
Guide to Force Protection
Detailed information about Jedi Robes, Cloaks and Equipment
by Glzmo
As there are now many different forms of robes and cloaks and accessories with different traits, it could be a little confusing which robe, cloak and accessories to go for. Therefore I have decided to write up all the details to guide Jedi to their choice of optimal protection, stats and looks in the form of Jedi Robes and Cloaks that are the most suitable for their individual style and needs.
Jedi Robes
Jedi Robes repesent the traditional, modest uniforms of the Jedi Order that are also being used by force-sensitive splinter groups like the Sith. Like the former, they are made of a special, robust and at the same time light material which provides ideal protection for the Jedi.
They are full body suits that occupy most clothing slots on the character, except the gloves, belt, necklace, wristband and hat slot (except the two Elder Jedi robes, which also take up the hat slot). For example, no backpack, bandolier or cloak can be worn when they are equipped.
There are no race or gender restrictions for wearing Jedi Robes, although the boots will be invisible on Trandoshan characters.
Padawan Robe
Standard Issue 
Where to get: Standard Issue Uniform Package (Jedi profession)
Required Level to Equip: 1
Required Profession: Jedi
Additional Restrictions: No-Trade
Skill Mods: Agility 10
2 Piece Bonus: -
Effect: -
Force Protection Intensity: -
Kinetic Protection: 0
Energy Protection: 0
Heat Protection: 0
Cold Protection: 0
Acid Protection: 0
Electricity Protection: 0
Padawan Robe
Force Shrine Replacement 
Known variants: White force shrine replacement
Where to get: Replacement Robe from Force Shrine
Required Level to Equip: 20
Required Profession: Jedi
Additional Restrictions: No-Trade, Prototype
Skill Mods: Agility 21, Force Power Regeneration 10
2 Piece Bonus: -
Effect: -
Force Protection Intensity: Faint
Kinetic Protection: 1400
Energy Protection: 1400
Heat Protection: 1400
Cold Protection: 1400
Acid Protection: 1400
Electricity Protection: 1400
Initiate's Robe
White 
Where to get: Profession reward granted at Force Sensitive Essentials I (Level 22)
Required Level to Equip: 20
Required Profession: Jedi
Additional Restrictions: No-Trade, Standard
Skill Mods: Constitution 21
2 Piece Bonus: -
Effect: -
Force Protection Intensity: Faint
Kinetic Protection: 1400
Energy Protection: 1400
Heat Protection: 1400
Cold Protection: 1400
Acid Protection: 1400
Electricity Protection: 1400
Acolyte Robe
Light 
Where to get: Loot from NPCs around Level 50+ NPCs (Confirmed: Elite humanoids in the Warren, Elite Faction NPCs in cities, Elite Chiss Poachers on Kashyyyk)
Required Level to Equip: 40
Required Profession: Jedi
Additional Restrictions: No-Trade, Manufactured
Skill Mods: Constitution 100, Strength 100
2 Piece Bonus: +55 Constitution, +25 Strength, +25 Precision, +15 Lightsaber Assembly, +5 Lightsaber Experimentation (with Belt of Master Bodo Baas )
Effect: -
Force Protection Intensity: Weak
Kinetic Protection: 3000
Energy Protection: 3000
Heat Protection: 3000
Cold Protection: 3000
Acid Protection: 3000
Electricity Protection: 3000
Acolyte Robe
Dark 
Where to get: Loot from NPCs around Level 50+ NPCs (Confirmed: Elite humanoids in the Warren, Elite Faction NPCs in cities, Elite Chiss Poachers on Kashyyyk)
Required Level to Equip: 40
Required Profession: Jedi
Additional Restrictions: No-Trade , Manufactured
Skill Mods: Constitution 100, Precision 100
2 Piece Bonus: +55 Constitution, +25 Strength, +25 Precision, +15 Lightsaber Assembly, +5 Lightsaber Experimentation (with Belt of Master Bodo Baas )
Effect: -
Force Protection Intensity: Weak
Kinetic Protection: 3000
Energy Protection: 3000
Heat Protection: 3000
Cold Protection: 3000
Acid Protection: 3000
Electricity Protection: 3000
Apprentice Robe
Light 
Where to get: Loot from Level 60+ NPCs
Required Level to Equip: 60
Required Profession: Jedi
Additional Restrictions: No-Trade , Manufactured
Skill Mods: Constitution 145, Strength 145
2 Piece Bonus: +55 Constitution, +25 Strength, +25 Precision, +15 Lightsaber Assembly, +5 Lightsaber Experimentation (with Belt of Master Bodo Baas )
Effect: -
Force Protection Intensity: Lucent
Kinetic Protection: 4000
Energy Protection: 4000
Heat Protection: 4000
Cold Protection: 4000
Acid Protection: 4000
Electricity Protection: 4000
Apprentice Robe
Dark 
Where to get: Loot from Level 60+ NPCs
Required Level to Equip: 60
Required Profession: Jedi
Additional Restrictions: No-Trade , Manufactured
Skill Mods: Constitution 145, Precision 145
2 Piece Bonus: +55 Constitution, +25 Strength, +25 Precision, +15 Lightsaber Assembly, +5 Lightsaber Experimentation (with Belt of Master Bodo Baas )
Effect: -
Force Protection Intensity: Lucent
Kinetic Protection: 4000
Energy Protection: 4000
Heat Protection: 4000
Cold Protection: 4000
Acid Protection: 4000
Electricity Protection: 4000
Jedi Knight Robe
Light 
Where to get: Loot from Level 80+ NPCs
Required Level to Equip: 80
Required Profession: Jedi
Additional Restrictions: No-Trade , Manufactured
Skill Mods: Agility 185, Constitution 185, Strength 185
2 Piece Bonus: +55 Constitution, +25 Strength, +25 Precision, +15 Lightsaber Assembly, +5 Lightsaber Experimentation (with Belt of Master Bodo Baas )
Effect: -
Force Protection Intensity: Luminous
Kinetic Protection: 5000
Energy Protection: 5000
Heat Protection: 5000
Cold Protection: 5000
Acid Protection: 5000
Electricity Protection: 5000
Jedi Knight Robe
Dark 
Where to get: Loot from Level 80+ NPCs
Required Level to Equip: 80
Required Profession: Jedi
Additional Restrictions: No-Trade , Manufactured
Skill Mods: Constitution 185, Luck 185, Precision 185
2 Piece Bonus: +55 Constitution, +25 Strength, +25 Precision, +15 Lightsaber Assembly, +5 Lightsaber Experimentation (with Belt of Master Bodo Baas )
Effect: -
Force Protection Intensity: Luminous
Kinetic Protection: 5000
Energy Protection: 5000
Heat Protection: 5000
Cold Protection: 5000
Acid Protection: 5000
Electricity Protection: 5000
Elder Jedi Arbiter Robe
Light 
Where to get: Complete Jedi Pilgrimmage Quest (Elder Jedi Reward only). Can be Replaced with the Elder Jedi Oppressor Robe by completing the Replacing my Robe quest.
Required Level to Equip: 80
Required Profession: Jedi
Additional Restrictions: No-Trade, Prototype
Skill Mods: Agility 250, Constitution 250, Strength 250
2 Piece Bonus: +55 Constitution, +25 Strength, +25 Precision, +15 Lightsaber Assembly, +5 Lightsaber Experimentation (with Belt of Master Bodo Baas )
Effect: Gift of the Light Side
The Force is Strong in this one.
Chance to fire an additional offensive damage effect
Force Protection Intensity: Radiant
Kinetic Protection: 6500
Energy Protection: 6500
Heat Protection: 6500
Cold Protection: 6500
Acid Protection: 6500
Electricity Protection: 6500
Elder Jedi Opressor Robe
Dark 
Where to get: Complete Jedi Pilgrimmage Quest Reward (Elder Jedi Reward only). Can be Replaced with the Elder Jedi Arbiter Robe by completing the Replacing my Robe quest.
Required Level to Equip: 80
Required Profession: Jedi
Additional Restrictions: No-Trade, Prototype
Skill Mods: Constitution 250, Luck 250, Precision 250
2 Piece Bonus: +55 Constitution, +25 Strength, +25 Precision, +15 Lightsaber Assembly, +5 Lightsaber Experimentation (with Belt of Master Bodo Baas )
Effect: Gift of the Dark Side
The Force is Strong in this one.
Chance to fire an additional offensive damage effect
Force Protection Intensity: Radiant
Kinetic Protection: 6500
Energy Protection: 6500
Heat Protection: 6500
Cold Protection: 6500
Acid Protection: 6500
Electricity Protection: 6500
Jedi Cloaks
At least as traditional and spread out like Jedi robes are the cloaks of the Jedi. Like the former, they are made of special, robust and at the same time light materials, which provides the ideal protection from weather effects for the Jedi. They are also used as a means to keep a low profile and vanish in the crowd if necessary.
Jedi cloaks occupy only the cloak slot of the character (except the hood-up variants, which take up the hat slot as well). It is therefore possible to wear everything you can wear with a regular cloak, including a backpack. They cannot be worn over Jedi Robes, because of the Robe's clothing slot restricitions.
There are no species or gender restrictions for wearing Jedi Cloaks, although some of them are invisible when worn by Wookiees or Ithorians, but still provide full protection and modifiers.
Cloak of the Kursk
Brown, Hood Down 
Where to get: Loot from San'sii the Kursk (Black Guard Camp on Mustafar)
Required Level to Equip: 80
Required Profession: Jedi
Additional Restrictions: Bio Link (manual), Prototype, invisible when worn by Wookiees or Ithorians
Skill Mods: Constitution 50, Precision 80
2 Piece Bonus: -
Effect: -
Force Protection Intensity: Lucent
Kinetic Protection: 4500
Energy Protection: 4500
Heat Protection: 4500
Cold Protection: 4500
Acid Protection: 4500
Electricity Protection: 4500
Robes of the Storm Caller
Black, Hood Down 
Where to get: Loot from The Storm Lord (Storm Lord Compound on Mustafar)
Required Level to Equip: 80
Required Profession: Jedi
Additional Restrictions: Bio Link (manual), Prototype , invisible when worn by Wookiees or Ithorians
Skill Mods: Constitution 50, Strength 80
2 Piece Bonus: -
Effect: -
Force Protection Intensity: Lucent
Kinetic Protection: 4500
Energy Protection: 4500
Heat Protection: 4500
Cold Protection: 4500
Acid Protection: 4500
Electricity Protection: 4500
Jedi Knight Cloak
Light 
Where to get: Chu-Gon Dar Cube (Warmly Glowing Deed, Warmly Glowing Gravestone, Warmly Glowing Scroll)
Required Level to Equip: 80
Required Profession: Jedi
Additional Restrictions: Bio Link (manual), Prototype , invisible when worn by Wookiees or Ithorians
Skill Mods: Agility 5, Constitution 80, Precision 50, Strength 50
2 Piece Bonus: -
Effect: -
Force Protection Intensity: Luminous
Kinetic Protection: 5000
Energy Protection: 5000
Heat Protection: 5000
Cold Protection: 5000
Acid Protection: 5000
Electricity Protection: 5000
Jedi Knight Cloak
Dark 
Where to get: Chu-Gon Dar Cube (Warmly Glowing Rod, Warmly Glowing Pillbox, Warmly Glowing Gravestone)
Required Level to Equip: 80
Required Profession: Jedi
Additional Restrictions: Bio Link (manual), Prototype , invisible when worn by Wookiees or Ithorians
Skill Mods: Agility 5, Constitution 80, Luck 50, Precision 50
2 Piece Bonus: -
Effect: -
Force Protection Intensity: Luminous
Kinetic Protection: 5000
Energy Protection: 5000
Heat Protection: 5000
Cold Protection: 5000
Acid Protection: 5000
Electricity Protection: 5000
Jedi Master Cloak
Light 
Where to get: Loot from the HK-47 Instance on Mustafar
Required Level to Equip: 80
Required Profession: Jedi
Additional Restrictions: Bio Link (manual), Lost Technology , invisible when worn by Wookiees or Ithorians
Skill Mods: Constitution 100, Luck 100, Precision 100, Strength 100
2 Piece Bonus: +55 Constitution, +25 Strength, +25 Precision, +15 Lightsaber Assembly, +5 Lightsaber Experimentation (with Belt of Master Bodo Baas )
Effect: -
Force Protection Intensity: Luminous
Kinetic Protection: 5600
Energy Protection: 5600
Heat Protection: 5600
Cold Protection: 5600
Acid Protection: 5600
Electricity Protection: 5600
Jedi Master Cloak
Dark 
Where to get: Loot from the HK-47 Instance on Mustafar
Required Level to Equip: 80
Required Profession: Jedi
Additional Restrictions: Bio Link (manual), Lost Technology , invisible when worn by Wookiees or Ithorians
Skill Mods: Constitution 100, Luck 100, Precision 100, Strength 100
2 Piece Bonus: +55 Constitution, +25 Strength, +25 Precision, +15 Lightsaber Assembly, +5 Lightsaber Experimentation (with Belt of Master Bodo Baas )
Effect: -
Force Protection Intensity: Luminous
Kinetic Protection: 5600
Energy Protection: 5600
Heat Protection: 5600
Cold Protection: 5600
Acid Protection: 5600
Electricity Protection: 5600
Shatterpoint Cloak
Hood Down 
Where to get: Meditate at Force Shrine and use the " There is no emotion, there is peace " radial menu option after completing the Master Jedi Cloaks Collection or use the Radial menu option " Hood Down " on the equipped Hood-up version of the Shatterpoint Cloak.
Required Level to Equip: 90
Required Profession: Jedi
Additional Restrictions: No-Trade, Lost Technology, Only one cloak of the same class in inventory or bank at a time
Skill Mods: Agility 135, Constitution 135, Luck 135, Strength 135, Two-Hand Lightsaber Damage 4, Polearm Lightsaber Damage 4, One-Hand Lightsaber Damage 4
2 Piece Bonus: +55 Constitution, +25 Strength, +25 Precision, +15 Lightsaber Assembly, +5 Lightsaber Experimentation (with Belt of Master Bodo Baas )
Effect: -
Force Protection Intensity: Radiant
Kinetic Protection: 6500
Energy Protection: 6500
Heat Protection: 6500
Cold Protection: 6500
Acid Protection: 6500
Electricity Protection: 6500
Shatterpoint Cloak
Hood Up 
Where to get: Use the radial menu option " Hood Up " on the equipped Hood-down version of the Cloak of Hate that you received by meditating at a Force Shrine and using the " There is no emotion, there is peace " radial menu option after completing the Master Jedi Cloaks Collection .
Required Level to Equip: 90
Required Profession: Jedi
Additional Restrictions: No-Trade, Lost Technology, Only one cloak of the same class in inventory or bank at a time
Skill Mods: Agility 170, Constitution 135, Luck 170, Strength 170, Two-Hand Lightsaber Damage 4, Polearm Lightsaber Damage 4, One-Hand Lightsaber Damage 4
2 Piece Bonus: +55 Constitution, +25 Strength, +25 Precision, +15 Lightsaber Assembly, +5 Lightsaber Experimentation (with Belt of Master Bodo Baas )
Effect: -
Force Protection Intensity: Radiant
Kinetic Protection: 6500
Energy Protection: 6500
Heat Protection: 6500
Cold Protection: 6500
Acid Protection: 6500
Electricity Protection: 6500
Cloak of Hate
Hood Down 
Where to get: Meditate at a Force Shrine and use the " Peace is a lie, there is only passion " radial menu option after completing the Master Jedi Cloaks Collection or use the radial menu option " Hood Down " on the equipped Hood-up version of the Cloak of Hate.
Required Level to Equip: 90
Required Profession: Jedi
Additional Restrictions: No-Trade, Lost Technology, Only one cloak of the same class in inventory or bank at a time
Skill Mods: Agility 135, Constitution 135, Luck 135, Precision 135, Force Electrical Damage 4
2 Piece Bonus: +55 Constitution, +25 Strength, +25 Precision, +15 Lightsaber Assembly, +5 Lightsaber Experimentation (with Belt of Master Bodo Baas )
Effect: -
Force Protection Intensity: Radiant
Kinetic Protection: 6500
Energy Protection: 6500
Heat Protection: 6500
Cold Protection: 6500
Acid Protection: 6500
Electricity Protection: 6500
Cloak of Hate
Hood Up 
Where to get: Use the radial menu option "Hood Up" on the equipped Hood-down version of the Cloak of Hate that you received by meditating at a Force Shrine and using the " Peace is a lie, there is only passion " radial menu option after completing the Master Jedi Cloaks Collection .
Required Level to Equip: 90
Required Profession: Jedi
Additional Restrictions: No-Trade, Lost Technology, Only one cloak of the same class in inventory or bank at a time
Skill Mods: Agility 170, Constitution 135, Luck 170, Precision 170, Force Electrical Damage 4
2 Piece Bonus: +55 Constitution, +25 Strength, +25 Precision, +15 Lightsaber Assembly, +5 Lightsaber Experimentation (with Belt of Master Bodo Baas )
Effect: -
Force Protection Intensity: Radiant
Kinetic Protection: 6500
Energy Protection: 6500
Heat Protection: 6500
Cold Protection: 6500
Acid Protection: 6500
Electricity Protection: 6500
Jedi Armor Clothing
To find out more about Jedi Armor clothing, read ScottyK's A Jedi's Guide to Armor Protection .
Armor Rating
The Armor rating is a variable in a formula that is used to calculate the percentage of the damage of a hit which is aborbed by the armor.
Formula: PR = (AR/10,000)*60 + ((10,000-AR)/10,000)*(AR/200)
Reduced Formula: PR = 0.011*AR - (5*10^-7) * AR^2
PR...Percentile Resists
AR...Armor Rating
Results:
0 = 0.0%
1400 = 14.4%
3000 = 28.5%
4000 = 36.0%
4500 = 39.4%
5000 = 42.5%
5600 = 45.9%
6500 = 50.4%
Jedi Accessories
There are many accessories Jedi and other Force users may choose to wear to enhance their garb of Robes and Cloaks in order to have the best combination of efficiency and style.
Belt of Master Bodo Baas
Wearable Item Container also known as "Jedi Waistpack" 
Where to get: Complete the Jedi Artifact - Jedi Waistpack Collection.
Required Level to Equip: -
Required Profession: -
Additional Restrictions: Old Republic Technology
Capacity: 65 items
Skill Mods: Constitution 50, Luck 50, Precision 50, Strength 50
2 Piece Bonus: +55 Constitution, +25 Strength, +25 Precision, +15 Lightsaber Assembly, +5 Lightsaber Experimentation (with various Jedi Robes and Cloaks)
Named after: Bodo Baas
Heroic Jewelry
Lightsaber Duelist's Jewelry
Five Piece Jewelry Set
Consists of: Lightsaber Duelist's Necklace, Lightsaber Duelist's Bracelet (Right), Lightsaber Duelist's Bracelet (Left), Lightsaber Duelist's Ring, Lightsaber Duelist's Band
Where to get: Trade in for Tokens of Heroism at Aurilian Trinket Shop ( /waypoint Dathomir 5355 -4161 Sivarra Mecheaux ). The full set requires 30 Tokens of Heroism (7 Axkva Min, 8 Mos Espa, 5 Droid Factory, 6 Black Sun, 4 Exar Kun).
Required Level to Equip: 85
Required Profession: Jedi
Additional Restrictions: No Trade, Unique, Lost Technology
Skill Mods (single piece): Jedi Strike Action Cost 1, Jedi Sweep Action Cost 1, Jedi Strike Cooldown 1 (0.1 second reduction), Jedi Sweep Cooldown 2 (0.2 second reduction)
3 Piece Bonus: +5 Strike Action Cost, +5 Sweep Action Cost
4 Piece Bonus: +10 Strike Action Cost, +10 Sweep Action Cost
5 Piece Bonus: +15 Strike Action Cost, +15 Sweep Action Cost, .5 sec reduction in Strike Cooldown (+5 Jedi Strike Cooldown), 1 sec reduction Sweep Cooldown (+10 Jedi Sweep Cooldown)
Full 5 piece set total: Jedi Strike Action Cost 20, Jedi Sweep Action Cost 20, Jedi Strike Cooldown 10 (1 second reduction), Jedi Sweep Cooldown 20 (2 second reduction)
Jewelry of Dark Fury
Five Piece Jewelry Set
Consists of: Necklace of Dark Fury, Bracelet of Dark Fury (Right), Bracelet of Dark Fury (Left), Ring of Dark Fury , Band of Dark Fury
Where to get: Trade in for Tokens of Heroism at Aurilian Trinket Shop ( /waypoint Dathomir 5355 -4161 Sivarra Mecheaux ) . The full set requires 30 Tokens of Heroism (8 Axkva Min, 6 Mos Espa, 7 Droid Factory, 5 Black Sun, 4 Exar Kun).
Required Level to Equip: 85
Required Profession: Jedi
Additional Restrictions: No Trade, Unique, Lost Technology
Skill Mods (single piece): Force Shockwave Action Cost 2, Force Lightning Action Cost 2, Force Shockwave Cooldown 3 (0.3 second reduction), Force Lightning Cooldown 3 (0.3 second reduction)
3 Piece Bonus: .5 sec reduction in Force Lightning Cooldown (+5 Force Lightning Cooldown), .5 sec reduction in Force Shockwave Cooldown (= +5 Force Shockwave Cooldown)
4 Piece Bonus: +5 Force Lightning Action Cost, +5 Force Shockwave Action Cost, 1.0 sec reduction in Force Lightning Cooldown (+10 Force Lightning Cooldown), 1.0 sec reduction in Force Shockwave Cooldown (+10 Force Shockwave Cooldown), 10% Fury Chance. Fury resets the cooldown of Force Lightning, Force Maelstrom or Force Shockwave after their use.
5 Piece Bonus: +15 Force Lightning Action Cost, +15 Force Shockwave Action Cost, 2.5 sec reduction in Force Lightning Cooldown (+25 Force Lightning Cooldown), 2.5 sec reduction in Force Shockwave Cooldown (+25 Force Shockwave Cooldown), 20% Fury Chance. Fury resets the cooldown of Force Lightning, Force Maelstrom or Force Shockwave after their use.
Full 5 piece set total: Force Shockwave Action Cost 25, Force Lightning Action Cost 25, Force Shockwave Cooldown 40 (4 second reduction), Force Lightning Cooldown 40 ( 4 second reduction), 2.5 sec reduction in Force Shockwave Cooldown, 20% Fury Chance. Fury resets the cooldown of Force Lightning, Force Maelstrom or Force Shockwave after their use.
Guardian's Jewelry
Five Piece Jewelry Set
Consists of: Guardian's Necklace, Guardian's Bracelet (Right), Guardian's Bracelet (Left), Guardian's Ring, Guardian's Band
Where to get: Trade in for Tokens of Heroism at Aurilian Trinket Shop ( /waypoint Dathomir 5355 -4161 Sivarra Mecheaux ) . The full set requires 30 Tokens of Heroism (7 Axkva Min, 8 Mos Espa, 6 Droid Factory, 5 Black Sun, 4 Exar Kun).
Required Level to Equip: 85
Required Profession: -
Additional Restrictions: No Trade, Unique, Lost Technology
Skill Mods (single piece): Block Chance 2, Constitution 20, Action Cost Reduction 1
3 Piece Bonus: +25 Constitution, + 5 Block Chance * +1% Combat Defense: Block
4 Piece Bonus: +50 Constitution, +10 Block Chance * +2% Combat Defense: Block, +5 Action Cost
5 Piece Bonus: +150 Constitution, +15 Block Chance * +3% Combat Defense: Block, +10 Action Cost, Gain the "Guardian Strike" attack. This quick and relatively effortless attack causes a great deal of hate increasing the likelyhood that the target will ignore others and attack you instead.
Full 5 piece set total: ~4.96% Combat Defense: Block (~1.96% from Block Chance 10 + 3% from Combat  " />efense Block 5 piece bonus), Constitution 250, Action Cost Reduction 1 5, Gain the "Guardian Strike" attack. This quick and relatively effortless attack causes a great deal of hate increasing the likelyhood that the target will ignore others and attack you instead.
* Since diminishing returns on Combat Defense: Block were added, the Bonus has been changed for a straight, undiminshed percentage. but the description hasn't been changed.
Jewelry of Heroism
Five Piece Jewelry Set
Consists of: Necklace of Heroism, Bracelet of Heroism (Right), Bracelet of Heroism (Left), Ring of Heroism, Band of Heroism
Where to get: Trade in for Tokens of Heroism at Aurilian Trinket Shop ( /waypoint Dathomir 5355 -4161 Sivarra Mecheaux ) . The full set requires 30 Tokens of Heroism (8 Axkva Min, 8 Mos Espa, 8 Droid Factory, 4 Black Sun, 2 Exar Kun).
Required Level to Equip: 85
Required Profession: -
Additional Restrictions: No Trade, Unique, Lost Technology
Skill Mods (single piece): Luck 30, Precision 30, Strength 30
3 Piece Bonus: +60 Stamina
4 Piece Bonus: +90 Stamina, +90 Agility
5 Piece Bonus: +150 Stamina, +150 Agility, +150 Constitution
Full 5 piece set total: Luck 150, Precision 150, Strength 150, Stamina 150, Agility 150, Constitution 150
Other Jedi Profession Specific Jewelry
Jedi's Wristguard (Right)
Right wrist jewelry 
Where to get: Treasure Map Loot.
Required Level to Equip: 61
Required Profession: Jedi
Additional Restrictions: Bio Link, Manufactured
Skill Mods: Jedi Strike Action Cost 3, Jedi Strike Critical Chance 3, Strike Damage 3, Jedi Strike Freeshot Chance 3
Jedi Knight Meditation Bracelet (Right)
Right wrist jewelry 
Where to get: Treasure Map Loot.
Required Level to Equip: 75
Required Profession: Jedi
Additional Restrictions: Bio Link, Prototype
Skill Mods: Lightsaber Assembly 3, Lightsaber Experimentation 10
Jedi Knight's Wristguard (Right)
Right wrist jewelry 
Where to get: Treasure Map Loot.
Required Level to Equip: 85
Required Profession: Jedi
Additional Restrictions: Bio Link, Prototype
Skill Mods: Jedi Strike Action Cost 4, Jedi Strike Critical Chance 4, Strike Damage 4, Jedi Strike Freeshot Chance 4
-----------------------------------------------------------------------------------------------------------------------------------------------------------------
"THE LEGACY"
Friday Feature 12/19/2003
For Your Character

This week all veteran characters (at least 3 weeks old) will be receiving a special gift in game, a Jedi Holocron. For you who aren't interested in gaining a clue towards your path to the Force, you can always sell it in-game. Be warned, the market for them may drop considerably for a little while.
Friday Feature 01/23/2004
Always in motion is the future: Changes to the Jedi System
I would like to start this post by saying thanks to everyone for the long and heartfelt conversations about this hot topic over the past few months. It is an issue that is very passionate to everyone involved. We have been reading the boards, reading email, listening to people who spoke with us and have had many discussions internally.
It has been agreed that the development team should revamp the Jedi system.
This process is going to take some time, so it will happen in several phases. The first phase is to make some changes (where possible) to alleviate some short term discomfort with gameplay. The second phase will be to rebuild the Jedi system to be quest-oriented; and to include the familiar elements of Force Sensitivity, Jedi-oriented quests, as well as many other elements the developers and the community feel should make up the process of becoming a Jedi. (It should also be noted that players who have put in work towards becoming a Jedi will not lose their effort. Some sort of recognition of players' efforts will be included in the new system.)

The first phase is for short term and those changes will appear in Publish 6. They are as follows:
- The permadeath system is being removed and changed to a skill revocation system based on deaths.
- Deaths will decay from the death counter after one week.
- Deaths after a buffer (3 to 5 depending on advancement) will have a skill revocation penalty.
- Skill revocation will be slight at first, but will increase in penalty as the player accumulates more and more non-decayed deaths.
- The skill revocation penalty will increase as a player advances up the skill tree.
- The skill to be revoked will be randomly chosen from the last skill earned in each of the 4 skill branches.
- No more than one skill will be revoked at a time, though players can get to a state where they lose a skill each time they die.
This is all of the information that is available at this time. As additional developments occur, we will post more information.
Friday Feature 08/20/2004
A short history of the Jedi, and how those seeking to become a Jedi did accomplish their goal.
--------------------------------------------------------------------------------------------------------------------------
BECOMING A "GLOWING" FORCE SENSITIVE
Collecting badges and completing themeparks and missions. There are various levels of force sensitivity (use /check command):
1 You feel no connection with the Force.
2 You barely notice something different about yourself.
3 You feel a faint sense of the Force.
4 You have a strong sense of the Force within you.
5 You feel the Force surge within you.
6 You feel an inner glow. The Force is with you.
- 1x Profession badge: ANY
- 5x Content badges: Jabba's Themepark / Nym's Themepark / Rebel-Imperial Themepark / 2x Warren Badges (Compassion, imperial hero) / 9x Corvette Badges (3x Rebel, 3x Neutral, 3x Imperial)
- 3x Jedi POIbadges: Ben's hutt - Tatooine / Jedi Temple - Dantooine / Exar Kun's Temple - Yavin
- 5x Easy POI badges: Escape Pod POI Lars Homestead POI Bottom of the Theed Falls POI Vreni Island Theater POI Rouge Corsec Base POI
- 2x Difficult POI badges: Krayt Skeleton - Tatooine / Dangerous Salacc Pit - Tatooine / Fort Tusken Pool - Tatooine / Krayt Graveyard - Tatooine / Lesser Sarlacc - Dathomir
----------------------------------------------------------------------------------------------------------------------------------------------------------
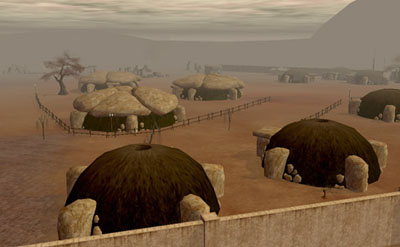
The Village of Aurilia
"I don't know. You can't see the stars here." Paemos complained.
"You can't see the stars anywhere on this planet, can you? I mean with the trees and the clouds..." Noldan stopped speaking and turned his head towards the elder, Rohak.
Rohak knelt down to the ground and lifted a handful of dirt to his face. He breathed in deeply, relishing the smell.
"It's good here. Green. Life."
The others nodded their heads in agreement. The three men stood and looked at each other for only a moment before Rohak spoke again.
"This is where we shall begin. The Village of Aurilia. The dream becomes reality..."
The Village of Aurilia was formed on the planet Dathomir by a small group of like-minded Force sensitive refugees who had, for one reason or another, abandoned their old lives. Some of them were hunted by agents of the Empire, their strange knack for piloting, healing, or combat making them dangerous to the Emperor, and the rumors of a Sith Lord who held a high power amongst the Imperials. Several of them had dealings with the Jedi Council. Some were brought forward by Jedi warriors after discovering their natural abilities. Others who brought themselves to the Jedi, hoping to be trained or at least given some explanation for these strange gifts that made other people look upon them with fear or trepidation. All of them were turned away for various reasons: political ramifications (one of the villagers has a father in the Imperial Navy), age (many of them were too old to begin the training), aptitude (many did not display the qualities of a Jedi Knight), or disinterest from the person themselves.
The Village is located in a desolate corner of Southwest Dathomir. This village is a remote primitive environment, with only a few of the comforts of modern society. The Village has stood undisturbed for years. The people live a rustic and agricultural life; they bother no one, trade with no one, and cause no trouble for the Empire, the Rebellion, or any of the various criminal organizations that exist throughout the galaxy. They've hidden themselves in plain sight. They don't do anything to actively discourage anyone from finding them, which in itself keeps them off the radar of most governments. Though they have no formal training many of them have become quite confident in their abilities, and they have no qualms about teaching what they've learned to anyone who is willing to listen.
Village Phases:
The Village changes dynamically over time as the story unfolds. A change in phase can result in the addition/removal of buildings as well as NPCs. It also determines what Quests are available. There are four phases each lasting for several weeks. They are as follows:
Phase I:
The Village has recently repealed a vicious attack by the enemy. Much of The Village defenses have been eliminated, buildings are destroyed, and many people have been hurt or killed. At this stage, The Village is preoccupied with picking up the pieces, healing the wounded, and determining the remaining strength of their enemy. The quests at this stage reflect this.
Phase II:
The Village continues build defenses. It is discovered that the enemy is regrouping. Another attack seems inevitable.
Phase III:
In an effort to repeal another invasion, The Village begins construction of a shield generator. Search and destroy operations are conducted to help keep the enemy at bay. The Village continues to grow in size. It is now walled from the defense building of Phase II.
Phase IV:
The shield generator is complete. The Village is at its maximum size. Despite this, it is attacked. Throughout this phase, waves of the enemy appear in coordinated groups. This phase culminates with a final onslaught. Although the enemy is repealed, The Village is all but destroyed. Return back to Phase I.


Marite shook her head. All the meetings had gone this way for the last few months. If she could just get Rohak to choose a side it would all be over, one way or the other.
He'd been increasingly obstinate. It was obvious he couldn't decide on a path. Perhaps, Marite thought, it's time for someone else to take over.
The thought had barely registered within her when he stood, his age making this take several seconds, and his weary bones creaking with every inch he gained in height. When he finally stood fully from the chair his height was still impressive. When he spoke everyone listened.
"Marite, you are right. We have no choice in this. The Force brought us together, gave us this land. The Force chose each and every one of us. We can not deny this. And it is the Force now that speaks to us. Listen with your hearts my fellows. Listen and you shall hear it too."
Marite felt her spirit lift. This would turn the tide. The decision was made.
"It's settled then." Quharek said. The Mon Cal sighed and looked over the gathered villagers. "From here out we shall invite those who possess our unique talents to join us. We will train them. We will help them. And we will be one with the Force. All agreed?"
The shout of triumph could be heard throughout the galaxy.
Players who have meditated at the shrine in order to become Force sensitive will meet with ambassadors from Aurilia. One of them (usually Marite) will send a message, and the player will be told where The Village is. It will, of course, be possible for players to stumble across Aurilia without being ready to be guided down that path, though the Aurilians will not train anyone who is not prepared.
Once players are on the right path they will be welcomed to The Village with open arms, and will be given the training they need to understand how their Force sensitivity works.
Accepting the Village Quests:
The Village quests are initiated by talking with specific NPCs. The player may also talk with the Village Elder to see what tasks are currently available and what skill branches they unlock. The player may only accept and complete one quest per village phase. If he is unable to complete it by the end of the phase, it ends in failure. He must start over the next time it becomes available.
Players who wish to achieve Force Sensitivity will go through a series of quests for The Village, and one of the things they can do is to gather specific resources for the creation of The Village's defenses.
- Crafting Quests: Crafting tree skills
- Combat Quests: Combat tree skills
- Reflex Quests: Reflex tree skills
- Survey/Healing Quests: Senses tree skills

Earning Force Sensitive Skills:
Force sensitive skills are broken into four disciple skill trees: Combat, Reflexes, Crafting, and Senses each having four branches. In order to unlock a branch, the player must complete the corresponding quest. Once complete, the branch is automatically unlocked. Unlocking the branch simply enables the player to learn those skills from the village skill trainer. He still must meet the experience requirements. Because a player may only commit to one quest per village phase, it requires at least six phases to unlock the six branches needed to qualify for Jedi. Although only six are required, the player is free to unlock as many branches as he wishes. Once a branch is unlocked, the skills within it must still be purchased through experience.
Force Sensitive Experience:
Each Force sensitive tree requires its own experience type. These experience types are granted through the conversion of standard experience types (any experience type the player can currently earn - crafting, combat, medical, etc). For example, purchasing Force sensitive crafting skills requires Force sensitive crafting experience. By talking with the village Counselor, the player is able to convert experience attained through normal crafting professions into something useable for the Force sensitive skills. Certain experience types may only be converted into certain Force sensitive types (only combat experience types can be converted into combat Force sensitive experience).
After successfully helping The Village of Aurilia, The Village Elder will set you on the path to Padawan.
Friday Feature 09/03/2004
Secrets of the Force
Ready, are you? What know you of ready? For eight hundred years have I trained Jedi. My own counsel will I keep on who is to be trained! A Jedi must have the deepest commitment, the most serious mind. This one a long time have I watched. Never his mind on where he was. Hmm? What he was doing. Hmph. Adventure. Heh! Excitement. Heh! A Jedi craves not these things. You are reckless!
The Jedi Trials
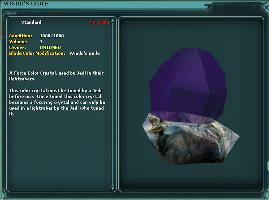
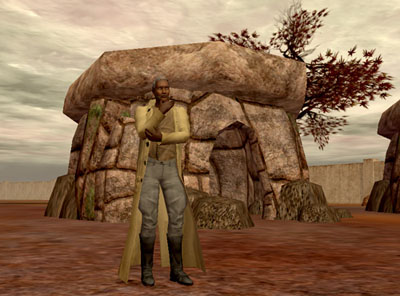 The new Force sensitive quests are a new path to Force sensitivity so that players may seek and find a fun and challenging series of adventures that will lead a player down the path to becoming a Jedi. The new path to becoming a Jedi has several stages in a cyclical story arc. First, a player should explore the galaxy, seeking places of mystery and completing quests within the game. Once you have sought wisdom throughout the galaxy, you will be visited by a mysterious old man who is an emissary of the Village of Aurilia. He is wise and will ask you for help. When the old man visits you, he will beg you to keep a mysterious crystal safe for it is very valuable. Once you take the crystal, it will sweep you away on a journey to understanding and honing your Force sensitive skills.
To find out how strong you are with the force, type /check and you may see one of a few possible Force rat ings (No sense, Barely Sense, Faint Sense, Strong Sense, Surging, Glowing). Once you are glowing with the force, it could be a few days or a few hours, but he will visit. Do not seek the old man, for he is in hiding from the Empire and enemies of the light side. Help the old man find you by being patient. Refrain from always zipping around in a vehicle and seeking combat. He wishes to find those who are seeking inner peace. If he feels you are worthy, he will visit you in the wilderness only.
But beware, for there are enemies in the galaxy who surely will want to take the Force Crystal. They will see you as weak and unworthy of the crystal, so be ready to protect yourself! Be especially wary of the Sith Shadows. They are an enemy of the old man and all that he stands for. If you get involved, they will see you as the friend of their enemy and hunt you down.
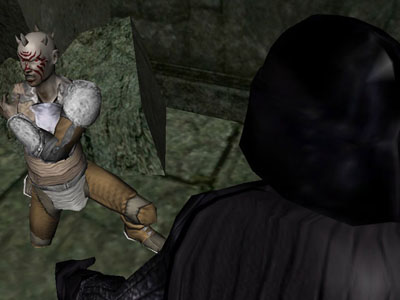
Sith Enemies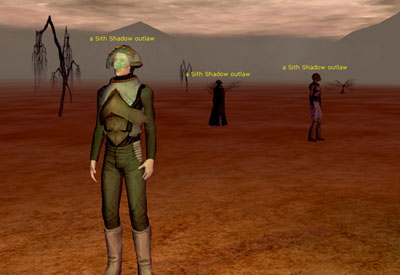 The Sith Shadows are a band of mercenaries led by a zealot Force-wielder named Mellichae. Mellichae was a promising student of the dark side, being considered for a position as one of the Emperor's Hands, alongside Mara Jade. However, things took a brutal turn for Mellichae when it was discovered that he held such low regard for the Emperor and his politics that he planned to assassinate him and insert himself as the new Sith Lord.
Darth Vader himself dispatched Mellichae, severing one of his limbs and leaving him for dead. In a rare mistake on Vader's part Mellichae survived, and has harbored his bitter rage over the following years, growing increasingly more insane.
Mellichae has formed his own band of followers now, called the Sith Shadows. His mercenary group consists of smugglers, pirates, outlaws, and murderers of all kinds. Their dark personalities mesh well with Mellichae's goals, allowing them to survive under his rule. No one joins the Sith Shadows lightly, and no one has ever left their employ alive.
 Mellichae surveyed the village from his speeder bike, well out of range of their sensors. His Zabrakian hearing brought him the sounds of building and conversation. He fingered the button on his lightsaber, stolen from his own master when he killed him in the final test. This must be how Darth Maul felt, he thought to himself. Before he slaughtered the enemies of the Sith. He looked around him at the mercenaries and students of the dark side, some of them his own pupils. Would one of them kill him someday? He doubted it very much. A young Twi'lek, still bruised, battered, and scarred from his last training cycle pulled up next to Mellichae.
"We're ready, my lord."
"Excellent." Mellichae said, the taste of blood already forming on his lips.
Mellichae, the Zabrak, is a mercenary. He believes he works for the Emperor, though the one time he did try to trace his payments back any further than three or four steps he hit a brick wall like nothing he'd ever encountered. Some of his men speculate that they're actually working for Black Sun. Prince Xizor certainly had his own animosity towards the Jedi. Though the people they are fighting aren't Jedi. They are just Force sensitives and villagers, farmers really.
So who are they working for? No one knows. At this point they're simply a renegade group of mercenaries, some with their own force sensitive powers, who are dedicated to destroying this peaceful village.
Why?
Mellichae believes that this is actually a secret training ground for new Jedi Knights and that they plan to rise up and destroy all those who believe in the Sith's teachings. Mellichae would like nothing more than to become a Sith Lord himself, though he knows he'll have to prove himself to the Emperor before that can happen. He never dreamed he'd have the opportunity, though he believes destroying the village will gain him that status.
His men are mercenaries as well, following Mellichae because he's the strongest of them. Some of his men were dark force wielders, trained by supposed Sith Lords or Dark Side Devotees. They were all driven from their previous lives by revenge, murder, thievery. Most of them are wanted "officially" for crimes against the Empire.
And yet, despite their not keeping a low profile they never seem to be arrested, they're rarely harassed by local Imperial politics, and they seem curiously well funded.
They call themselves The Sith Shadows, or more often just the Shadows, since they're affiliation with the Sith is mostly wishful thinking.
Surviving your first encounter with the Sith Shadows will lead you to a small agriculture cooperative village on Dathomir. This is the Village of Aurilia.
The Village
The Village of Aurilia was formed on the planet Dathomir by a small group of like-minded Force sensitive refugees who had, for one reason or another, abandoned their old lives. Some of them were hunted by agents of the Empire, their strange knack for piloting, healing, or combat making them dangerous to the Emperor. Several of them had dealings with the Jedi Council. Some were brought forward by Jedi warriors after discovering their natural abilities. Others brought themselves to the Jedi, hoping to be trained or at least given some explanation for these strange gifts that made other people look upon them with fear or trepidation. All of them were turned away for various reasons. Some of these reasons are political. For instance, one of the villagers has a father in the Imperial Navy. For others, it is their age since for many of them were too old to begin the training. For others still, it was aptitude since many did not display the qualities of a Jedi Knight. For whatever reason they were not accepted into official training, they were accepted in Aurilia.
The Village is located in a desolate corner of Southwest Dathomir. This village is a remote primitive environment, with only a few of the comforts of modern society. The Village has stood undisturbed for years. The people live a rustic and agricultural life; they bother no one, trade with no one, and cause no trouble for the Empire, the Rebellion, or any of the various criminal organizations that exist throughout the galaxy. They've hidden themselves in plain sight. Some say there is a powerful Force mist that protects the village, but that has never been proven. The villagers don't do anything to actively discourage anyone from finding them, which in itself keeps them off the radar of most governments. Though they have no formal training many of them have become quite confident in their abilities, and they have no qualms about teaching what they've learned to anyone who is willing to listen.
Meeting with the Village Elder
Once you have the crystal, it is likely two Sith Shadows will attack you and try to take it away. If you defeat the mercenaries, you will move closer to Force sensitivity and being your journey. One of the soldiers possesses a datapad which gives the location of a nearby operations camp. Upon defeating the enemies at this camp, you should search to find documents about concerns of more and more people becoming aware of the Force. A clandestine group on the world of Dathomir is seeking out these people to persuade them into join their society. This emergence of the Force must be stopped at all costs and anyone showing any inclination of its influence must be hunted down and killed. Your search will lead you to Aurilia. There, you will have a meeting with the Village Elder. Once the player reaches the village and talks with the Village Elder, he or she receives the Force Sensitive title and becomes eligible to participate in the Force Sensitive quests.
Getting Involved
Marite shook her head. All the meetings had gone this way for the last few months. If she could just get Rohak to choose a side it would all be over, one way or the other. He'd been increasingly obstinate. It was obvious he couldn't decide on a path. Perhaps, Marite thought, it's time for someone else to take over.
The thought had barely registered within her when he stood, his age making this take several seconds, and his weary bones creaking with every inch he gained in height. When he finally stood fully from the chair his height was still impressive. When he spoke everyone listened.
"Marite, you are right. We have no choice in this. The Force brought us together, gave us this land. The Force chose each and every one of us. We can not deny this. And it is the Force now that speaks to us. Listen with your hearts my fellows. Listen and you shall hear it too."
Marite felt her spirit lift. This would turn the tide. The decision was made.
"It's settled then." Quharek said. The Mon Cal sighed and looked over the gathered villagers. "From here out we shall invite those who possess our unique talents to join us. We will train them. We will help them. And we will be one with the Force. All agreed?"
The shout of triumph could be heard throughout the galaxy.
Initiates who have meditated at a shrine will meet with ambassadors from Aurilia. One of them (usually Marite) will send a message, and the initiate will be told where the village is. It will, of course, be possible to stumble across Aurilia without being ready to be guided down that path, though the Aurilians will not train anyone who is not prepared. Once seekers of the village are on the right path they will be welcomed to the village with open arms, and will be given the training they need to understand how their force sensitivity works.
Who's Who
Rohak: Village Elder. Rohak was with the original group who founded Aurilia, and has been it's spiritual guide ever since. He's very old and very wise...for a human. Seek his guidance.
Quharek:Quharek is a Mon Cal who has forsaken his own name for one given to him by the village. The villagers couldn't pronounce his given name. He's a craftsman and an expert on building, resource gathering. He is also adept at overseeing large construction projects.
Marite: Marite is a female Trandoshan, outgoing and outspoken. She championed the idea of bringing in new people to train, hoping that it would start down the path of understanding for those who are force sensitive. On her homeworld, her own tribe disowned and cast her out because of her bizarre Force sensitive gifts. She is the village's ambassador to the outside world and has an amazing ability to heal.
Noldan: Noldan is a Trandoshan and a master of melee combat. He is in love with Marite, believing his heart's secret is his own, but she is aware of his feelings and she reciprocates them. She won't act on her feelings though until she believes the village is safe from harm. Noldan has been known to train outsiders who are working for the benefit of the village.
Paemos: Paemos is a Rodian, and an expert with ranged weapons of all types. He is friendly to everyone, a trait that made him few friends on Rodia. He is much happier in the village and will give his life to defend it if need be. Paemos knows a thing or two about Force Sensitive skills and can show initiates the ropes of experience.
Whip: Whip is a young human male whose reflexes are a sight to behold. He is definitely the best pilot in the village. He hates the Empire more than any of the others. He feels that if they hadn't outlawed pod-racing he would be a rich and famous racer, the best in the galaxy, and he resents the Empire because of this.

Village Arc
The Village is a cyclical story arc that changes dynamically over time as the story unfolds. A change in phase can result in the layout of the village and how NPC's will react - - the story may not be the same for every initiate that enters the village. It also determines what quests will be available to those seeking Force Sensitivity. There is a crafting quest, a combat quest, a reflex quest and medical/survey quest throughout each phase of the village's cycle. If you want to re-do the quest or choose another type, you can wait for the village story arc to begin again and you may re-start or try another quest.
Part I: The village has recently repealed a vicious attack by the Sith Shadows. Much of the village defenses have been eliminated, buildings are destroyed, and many people have been hurt or killed. At this stage, the village is preoccupied with picking up the pieces, healing the wounded, and determining the remaining strength of their enemy.
Part II: The village continues build defenses. It is discovered that the enemy is regrouping. Another attack seems inevitable, and initiates who help can turn the tide.
Part III: In an effort to repeal another invasion from the Sith Shadows, the village begins construction of a shield generator. Search and destroy operations are conducting to help keep the enemy at bay. The village will continue to grow in size.
Part IV: Those who work diligently can help complete the shield generator so the village can be safe from its enemy. Despite this, The Sith Shadows will not give up. You may be their only hope.
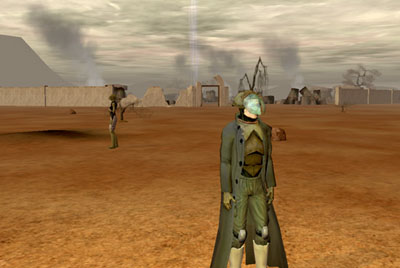
Earning Force Sensitive Skills
Force sensitive skills are broken into four Force discipline skill trees: Combat, Reflexes, Crafting, and Senses, each having four branches. There is a quest for each branch that will evolve through each phase of the Village. Once complete, the skill branch is unlocked. Unlocking the branch simply enables the player to learn those skills from the village skill trainer. He or she must still meet the experience requirements.
May the Force be with you. Always.
No more training do you require. Already know you that which you need.
-----------------------------------------------------------------------------------------------------------------------------------------------------------------
The Old Man
Once you are 'glowing' with the
Force, you should receive a visit from the Old Man, typically within
72hrs. The Old Man has been reported in many locations, both inside and
outside player cities. He spawns randomly, Eventually
the Old Man will visit you, and ask if you have ever considered the
possibility that you are Force Sensitive. If you say yes, he will offer
you a crystal to protect, which acts as a log on your journey to Jedi.
Once your conversation with the Old Man is complete, he despawns, and
you are ready for the next stage.
The Sith
The Sith come in two parts. The first
is a random spawn that operates in much the same way as the old man.
They will appear and attack within 72hrs, you can use the same
techniques listed above for causing an faster spawn, such as shuttling
to another city etc. When they appear, they are very easily defeated,
and you should loot them. There is a fair chance that they will have a
datapad to use containing information regarding their basecamp, and a
WP to it is added to your datapad.
Once you have the Sith Camp WP, travel
there. The Sith Camp has 3-4 NPC's, again, very easily defeated, and
once more, a datapad with the Dathomire Village location, and a single
unit of some mineral. Keep the mineral, and use the datapad to obtain
the location for the Dathomire Village.
With the new WP for the Village, travel there.
The Village of Aurilia, and planning and training your Force Skills
The Village is located on Dathomire,
5000m South East of the Science Outpost. Once you are there, things
start to get a little more complex, so pay attention.
The Village Quests simply allow you to unlock a branch and devote Force XP into the unlocked branch. There are four total skill trees: Combat Prowess, Crafting Mastery, Enhanced Reflexes and Heightened Senses. Each of these trees has four branches, so sixteen branches in total.
You must master SIX of the possible sixteen branches.
The trees and branches are as follows [Bonuses are in brackets]:
Combat Prowess: Ranged Accuracy [+12 ranged acc]
Combat Prowess: Ranged Speed [+12 ranged speed]
Combat Prowess: Melee Accuracy [+12 melee acc]
Combat Prowess: Melee Speed [+12 melee speed]
Crafting Mastery: Experimentation[+20 experimentation*]
Crafting Mastery: Repair [+20 repair]
Crafting Mastery: Assembly [+20 assembly]
Crafting Mastery: Technique [+4 technique]
Enhanced Reflexes: Ranged Defence[+20 ranged defence]
Enhanced Reflexes: Melee Defence [+20 melee defence]
Enhanced Reflexes: Vehicular Control[+20 vehicular control, +3 acceleration]
Enhanced Reflexes: Survival[+5 to: Camping, Foraging, Mask Scent, Creature Harvesting, Creature Knowledge, Trapping, Terrain Negotiation]
Heightened Senses: Healing [+20 to: Injury Treatment Speed, Wound Healing (Dancing), Wound Healing (Music)]
Heightened Senses: Surveying [+20 surveying]
Heightened Senses: Persuasion [+20 persuasion]
Heightened Senses: Luck [+4 luck]
The branches unlock four per village cycle, and there are four cycles. What you can unlock is set though, so, if you have free unlocks, ideally you want to unlock the skills you want that are normally unlocked in a later cycle.
Here are all the Phases and what can be unlocked in each Phase:
Village Phase 1: Combat Prowess: Ranged Accuracy
Village Phase 1: Enhanced Reflexes: Survival
Village Phase 1: Heightened Senses: Persuasion
Village Phase 1: Crafting Mastery:Assembly
Village Phase 2: Combat Prowess: Melee Speed
Village Phase 2: Enhanced Reflexes: Vehicular Control
Village Phase 2: Heightened Senses: Survey Tree
Village Phase 2: Crafting Mastery: Crafting Techniques
Village Phase 3: Combat Prowess: Melee Accuracy
Village Phase 3: Enhanced Reflexes: Ranged Defense
Village Phase 3: Heightened Senses: Luck
Village Phase 3: Crafting Mastery: Experimentation
Village Phase 4: Combat Prowess: Ranged Speed
Village Phase 4: Enhanced Reflexes: Melee Defense
Village Phase 4: Heightened Senses: Healing
Village Phase 4: Crafting Mastery: Repair
Of these, you must pick six. For those who have free unlocks, the next part is important:
Imagine you want Combat Prowess: Ranged Accuracy, Melee Speed, Melee Accuracy, Ranged Speed, Enhanced Reflexes: Ranged Defence, Melee Defence.
You must bear in mind that YOU CAN ONLY DO ONE QUEST PER PHASE!
With this in mind, plan out what comes first in the list. For the above skills selected, my template is kinda like this:
Village Phase 1: Combat Prowess: Ranged Accuracy
Village Phase 2: Combat Prowess: Melee Speed
Village Phase 3: Combat Prowess: Melee Accuracy
Village Phase 3: Enhanced Reflexes: Ranged Defense
Village Phase 4: Enhanced Reflexes: Melee Defense
Village Phase 4: Combat Prowess: Ranged Speed
Now, you can see here that I have two in Phase 3, and two in Phase 4. If I had no unlocks, I would have pick one of the Phase 3 skills and one of the Phase 4 skills to unlock through the quests, and then wait a FULL CYCLE before I could do the second skill in Phase 3, and then the second in Phase 4, delaying my Jedi Initiate by up to 12 weeks.
I would have to train in this order:
Week 1: Village Phase 1: Combat Prowess: Ranged Accuracy
Week 4: Village Phase 2: Combat Prowess: Melee Speed
Week 7: Village Phase 3: Combat Prowess: Melee Accuracy
Week 10: Village Phase 4: Enhanced Reflexes: Melee DefenseWeek 13: Village Phase 1: Nothing I desire availableWeek 16: Village Phase 2: Nothing I desire availableWeek 19: Village Phase 3: Enhanced Reflexes: Ranged DefenseWeek 22: Village Phase 4: Combat Prowess: Ranged Speed
However, if you are clever, you can use your free unlocks to reduce your waiting time. Imagine I have two free unlocks. First unlock would go on the last skill you would train,Combat Prowess: Ranged Speed, and the second unlock would be used forEnhanced Reflexes: Ranged Defense. This immediately means that the last skill you need to unlock by waiting for the normal village cycle and performing the relevant quest would be:
Week 10: Village Phase 4: Enhanced Reflexes: Melee Defense
Now I am finished on week 10, instead of week 22, all by careful planning of what skills I need, and what order to use my free unlocks.
To get a free unlock, you must talk to Paemos, who offers any free unlocks you might have. He will unlock the branch of your choice, and allocate enough xp to master that branch. Training is provided by Noldan.
Remember: Unlock ONE free branch at a time, train it, then return for another free branch.
Once you have attained your free unlocks, it's time to do the quests relevant to the other branches you want to do as part of the six required to move on to Jedi Initiate. Personally, I would do all of the quests, as there are some cool rewards.
Quests and XP Conversion
Each NPC offers a different Quest in each Phase. One NPC will offer Quests to unlock Combat Prowess skills, another would offer Crafting Mastery, and so on. They will offer different Quests in each Phase.
Here are the Quests listed with their Phases, and their rewards:
Phase: Force Skill Tree: Specific Branch Unlocked: Quest Name: Reward
Phase 1: Combat Prowess: Ranged Accuracy: Angry Villagers: 10 Patrols unlocks, 20 obtains the Aurilian Banner
Phase 1: Enhanced Reflexes: Survival: Distraught Villagers: Aurilian Sculpure Part 3 of 4
Phase 1: Heightened Senses: Persuasion: Aid Station: 5 Villagers unlocks, 10 for +5 CM XP necklace, Aurillian Plant
Phase 1: Crafting Mastery:Assembly: Clean Up Crew: Aurilian Sculpure Part 4 of 4
Phase 2: Combat Prowess: Melee Speed: Raiding party: Durable Lathe [300 use melee p'up with +30 speed]
Phase 2: Enhanced Reflexes: Vehicular Control: Quarter Master: Focus crystal, +2000 health for 2hrs, reuse 72hrs
Phase 2: Heightened Senses: Survey Tree: Construction Forman: ?
Phase 2: Crafting Mastery: Crafting Techniques: Puzzled Engineer: Lightsaber Toolkit
Phase 3: Combat Prowess: Melee Accuracy: Armed Group: Power Crystal, +900 mind for 2hrs, reuse 96hrs
Phase 3: Enhanced Reflexes: Ranged Defense: Raiding Party: Item with limited uses, adds +10 to ranged defence
Phase 3: Heightened Senses: Luck: Construction Forman: Inorganic Survey Tool
Phase 3: Crafting Mastery: Experimentation: Engineer: ?
Phase 4: Combat Prowess: Ranged Speed: Village Elder: Aurilian Sculpure Part 1 of 4
Phase 4: Enhanced Reflexes: Melee Defense: Village Elder: ?Phase 4: Heightened Senses: Healing: Fenzied Doctor: Bacta Tank
Phase 4: Crafting Mastery: Repair: Chief Engineer: Aurilian Sculpure Part 2 of 4
The following NPC's and their quest types:
Once a branch is unlocked, you must grind experience (any type) and talk to Paemos, who will convert the normal xp into force xp. There are limitations on what kind of normal xp can be used in what tree. For instance, unarmed, combat or rifles xp is only suitable for the Combat Mastery and Enhanced reflexes. Merchant and crafting xp is suitable for Crafting Mastery, and so on.
The conversion ratio is often steep, you will have to grind hard in order to earn enough experience to fill each branch. This will be no walk in the park. Here are the ratio's:
Combat & Reflex xp
- Weapons (any type) xp 30:1
- Combat xp 3:1
- Squad Leader xp 90:1
- Bounty Hunter Investigation xp 5:1
Sense xp
- Image Design xp 15:1
- Dancing xp 10:1
- Musician xp 10:1
- Entertainer Healing xp 10:1
- Survival xp 5:1
- Scout xp 8:1
- Trapping xp 15:1
- Medical xp 10:1
- Surveying xp 5:1
- Merchant xp 4:1
- Creature Handling xp 9:1
- Slicing xp 3:1
- DNA Sampling xp 3:1
Crafting xp
- General Crafting xp 8:1
- Architect xp 35:1
- All other crafting 5:1
The easiest method would probably be to pick your six branches from the Combat Prowess and Enhanced Reflexestrees, as with an elite melee profession, you should be able to grind xp very fast. Once you max out your xp, travel to the village, and talk to Paemos to have the xp converted to force xp. Then it's back to the grind for more xp, until you max, return to the Village and Paemos, convert the xp, rinse and repeat, until you have enough force xp to master a new box, and then you talk to Noldan, for training.
If there are no branches unlocked for you to train in, you are perhaps waiting for a later stage, simply grind xp anyway, and convert it, until your force xp is maxed out, and then max out your other normal xp too, so that when you unlock another branch, you have plenty of xp to devote to the new branch, speeding up your grinding process.
No Force-Sesitive xp cap has been discovered as yet, but it is safe to assume that like most other xp's, it is twice the current highest skill box.
Once you have unlocked six branches, and converted enough xp to master those branches, you will be eligible for the Jedi Padawan Trials.
Jedi Initiate
When you have mastered six branches of the Force Sensitive trees, you will again be visited by the Old Man. He will give you a datapad that contains the location of an NPC namedMellichae. You must find and kill him to start your quest for Jedi Padawan.
This ain't too easy, although if you are a double melee elite master with some medic, you might solo it. Otherwise bring friends. Here is the low down on what you will be facing:
Mellichae: 55k HAM, 80% resist to everything except Lightsabers. Is surrounded by four force crystals of some sort that you must destroy, as he uses them to heal himself and is virtually unkillable until the force crystals are gone. Armed with a Lightsaber, Force Choke, and Force Lightening.
Daxter: 25k HAM, 80% resists to everything except Lightsabers.
Sith: A bunch of Sith NPC's, roughly eight, not to difficult to dispatch.
You must first destroy the four force crystals, each has approximately 40k HAM. Take out the Sith and Daxter where possible, and finally, kill Mellichae. Upon completion, you can begin your grind towards Padawan.
Padawan Trials
This is the best info I can find from various threads, I don't know many people at this point, but a guild member is about to undergo them in a few days, so I will update with better info as and when I get it from him.
Some small points:
- Avoid missions on Rori, apparently they are bugged.
- You may need good Gungan faction for one of the missions.
- For the Chef mission, you do not need high Cobral Faction, simply refuse to help him get revenge.
And, the Trials:
Architect Trial: A jedi must gather all possible information before making his decision. You will be given a waypoint. Travel there, and speak to two disputing parties. As far as I can tell, speak to everyone involved, then your decision should be that the Gungan can keep his land.
Artist Trial: A Jedi must understand the motivations and desires of others without becoming emotianlly involved. Again, you are given a waypoint to travel to. Speak to the Artist, Sathme, and her assistant. The winning decision is to return the supplies to the artist, and tell her that her assistant will not be coming back.
Bad Cat Trial:A Jedi must do everything possible to keep innocent civilians from being in danger. Another waypoint, leading you to actor Yvana Bailer, who asks for help ending the rampage of an escaped cat. Kill the wild cat to complete the trial.
Chef Trial: A Jedi must be willing to put himself in danger in order to do what is right. A waypoint leads to a Chef who wants you to find out who is stealing his goods. I would imagine that you would hunt down the people stealing, however, since it is possible to cheat on this Trial, by telling him you won't help [this completes the trial for you], I cannot find any accurate information. Will update later.
Old Musician Trial: A Jedi must always display respect and dignity when interacting with others. Travel to the waypoint, speak with Grizzlo, the old musician. He wants you to find the members of his band. Travel first to Eisley, then to Lok, speak to the NPC's at the wp's, and finally return to Grizzlo with the ring you attain.
Pannaqa Trial: A Jedi should always be willing to lend a helping hand whenever possible. Travel to the waypoint, speak with the Farmer, Pannaqa, who needs help obtaining parts for his vibro-tiller. Speak to the first NPC, and then move on to the second NPC, who it appears you must tell you don't trust, and that you will do it for him... you are given a vibro tiller to return to the farmer, completing the trial.
People's Soldier Trial: A Jedi must put aside personal feelings when aiding someone they might not find appealing. Travel to the waypoint, speak to Torin Gundo, who gives you a mission to kill a thug. Kill the thug to complete the Trial.
Sob Story Trial: A Jedi should remain calm in the face of emotion. Travel to the waypoint, and speak to Erim Thelcar. She asks that you find her brother, or his remains, and return the blaster that was a family heirloom. I think that there is another waypoint, where you find his remains, and loot the blaster, which can be returned to Erim to complete the Trial.
Spice Mom Trial: A Jedi should always strive for understanding rather than blind faith. Travel to the waypoint, speak with Sola Nosconda, who will ask you to pick up some items. Speak with the Spice dealer, obtain the spices, return to Sola. You must get her to threaten you before you hand over the spices. If you do that, the Trial will be successful.
Surveyor Trial: A Jedi should be prepared to undertake that which others will not. Follow the waypoints to Par Doiae, who wants you to kill a Sharnaff bull that is terrorising a site he wants to build on. Kill the bull to complete the trial.
Politician Trial:A Jedi should be equally a public servant and a public defender. Travel to the waypoint to speak with Kaul Dysen, who wants help killing a Bloodseeker Mite that is terrorising the local populace. Find and kill it to complete the Trial.
The Ring Trial: A Jedi must recognize chaos but not become a part of it. Follow the waypoints to Keicho, who has had his wife's mothers wedding ring stolen and wants it back. Find the thug that stole it, converse with him and choose to fight, then return the ring to Keicho to complete the Trial.
The Baz Nitch Trial:A Jedi must be an able and courageous warrior. Follow the waypoints to Menchi, who asks that you kill 20 Baz Nitch's. Kill twenty to complete the Trial. They are found on Dathomir.
The Sludge Panther Trial: A Jedi must do whatever is possible to protect the natural order of the universe. Follow the waypoints, speak to Luha, who asks you to kill 20 sludge panthers. Kill 20 to complete the Trial. The can be found near Dearic, or the Lost City of Durbin.
The Falumpaset Panther Trial: A Jedi must understand that there are times when a greater good outweighs a lesser evil. Follow the waypoints, speak to Braganta, who asks you to kill 20 falumpasets. Kill 20 to complete the Trial. Gungan sacred place or missions to complete.
Craft Lightsaber Trial:Thanks to your progress thus far, you have been granted the rank of Jedi Initiate. With this honor comes the ability to craft your first lightsaber. Such is your next task... to craft yourself a lightsaber. Craft one to complete the Trial, this is the final Trial, and once complete, you are a Jedi Padawan. You will need a single force crystal to tune to complete this Trial.

Aurilia emerges from the mist in Chapter 7! The citizens of the village have decided to re-open their doors to the outside world. While Aurilia was hidden, the small village evolved into a bustling township still sympathetic to adventurers looking for help. Find out more about the township of Aurilia and the people who call it home.
The Village
The village of Aurilia was once a haven for Force sensitive refugees on Dathomir. A primitive settlement in a desolate area of the planet, the inhabitants led a rustic life. The Force sensitives living in the village wanted nothing more than to escape any notice. But their efforts to remain out of sight of any prying eyes were in vain. The village faced an onslaught of unending attacks from a Dark Jedi called Mellichae, who was eager to gain the Emperor's favor by capturing the Force users.
Aurilia withdrew from the outside world in a last effort to defend and rebuild. Calling on the Force to completely conceal themselves, the inhabitants hid the village of Aurilia within an impenetrable fog… until now.
Aurilia Emerges
The mist has lifted to reveal a stronger, well-defended Aurilia. The former village has changed quite a bit in recent times.

The village has grown and prospered into a small township, having finally defeated their enemy Mellichae and his band of terrorists known as the Sith Shadows. Mellichae remains imprisioned within the city's fortified walls.

Aurilia has become a hub for adventurers who seek assistance but wish to remain off the radar of the Galactic Empire, the Rebel Alliance, and the various underground criminal organizations. As such, thrillseekers hoping to make a name for themselves are taking the journey to the township.

The Empire quietly tolerates Aurilia as long as it remains useful to them both as a source of information and as a means to deal with the occasional conflict that must be handled without undue scrutiny.
Meet the Townspeople
Rohak is the town elder and one of the original founders of the village of Aurilia. He is proud to see how his village has grown, but still remains wary of the outside world.
Captain Sarguillo, commander of the Aurilian Security Force, also keeps a close eye on all visitors in the exposed township. The loyal Zabrak will do what it takes to defend his home.

Paemos, the Rodian mayor of the township, is friendly to the adventurers in Aurilia.
Join Your Allies
Travel to Aurilia is available from Mos Eisley, Coronet, and Theed, but only to players level 70 or higher who have already made the journey through Dathomir on foot. The township of Aurilia is a hub for high level players to meet other like-minded allies for quests and to prepare for heroic encounters. Take the trek to Aurilia with your friends and get ready to take on the toughest enemies in the galaxy!