- Jump To Lightspeed = Space Combat Simulation
- Fast 3D Action
- Fully customizable ships
- Ship management
- 3D ship cockpits
- fully decorable 3D ship interiors
- 1st / 3rd person views
- supports force feedback
- fully customizable Joystick / keyboard support
- native TrackIR support
Deep Space
Deep Space is a region of Star Wars Galaxies that is constantly in a state of turmoil. As a PvP zone, you must first go overt before heading to Deep Space in order to earn GCW and faction points for destroying enemies. You can do this by visiting the appropriate station for your faction. The following stations do not allow you to declare overt but are the ones you must visit to travel to Deep Space.
- Imperial pilots should contact the Imperial Claw Station in the Endor System to travel to the Deep Space sector.
- Rebel pilots should contact the Deep Space Station in the Dantooine System to travel to the Deep Space sector.
- Freelance pilots should contact the Last Nav Station in the Dathomir System to travel to the Deep Space sector.
- Imperials and Rebels can declare overt at any other factional space station.
While it is a PvP zone, there are also many factional space vessels for you to fight as well. Be prepared to face both players and NPC's! The main goal for both sides (Rebel and Imperial) is to destroy the opposing forces. For the Rebels, that is the Imperial Star Destroyer . For the Imperials it is the Freedom Space Station .
Freedom Station is protected by an NPC Nova Courier and tier 5 fighters. To destroy Freedom Station, Imperial pilots must destroy the stations:
- Shields
- Secondary Shields
- Reactor
- Bridge
The Imperial Star Destroyer is protected by an NPC Decimator and tier 5 fighters. To destroy the Imperial Star Destroyer, Rebel pilots must destroy the ship's:
- Shields
- Secondary Shields
- Engine
- Reactor
- Bridge
Capital Ships
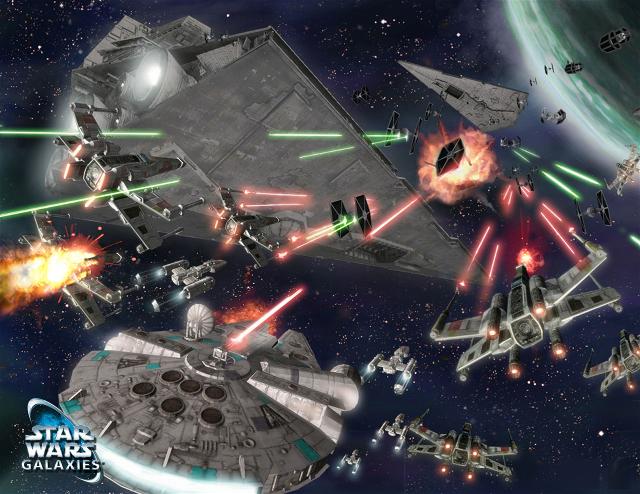
In the Galactic Civil War, no one is safe from the conflict. With battles for strategic locations raging on planets throughout the galaxy, new threats have emerged in the blackness of space. Now with the conflict reaching a desperate pitch, the Rebellion and the Empire are scrambling powerful capital ships, seeking to bring a decisive end to the battles.

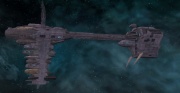
A Rebel Nebulon Class B Frigate faces off against an Imperial Lancer-class Frigate.
Fortified by massive armor and shields, capital ships will require the combined effort of many fighters and a capital ship of their own to bring them down. Combat has reached a fever pitch in the space above Tatooine, Corellia, Naboo, Lok, and Dantooine.
New Fighters
Of course, your Rebel or Imperial commanders would not ask you to meet almost certain destruction unprepared. To help even the odds, new fighters are now available.

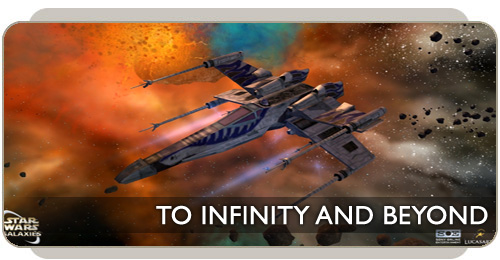
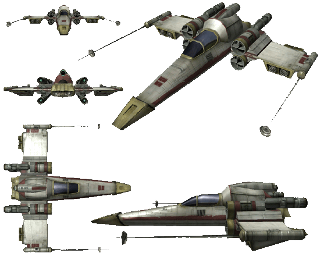
A new T-wing roars into battle.
Rebel pilots can now choose to fly the T-wing into battle. This light and fast ship was designed as the Rebel answer to the Royal TIE Interceptor. If you like going fast and relying on your reflexes to keep you in the fight, this is the ship for you.

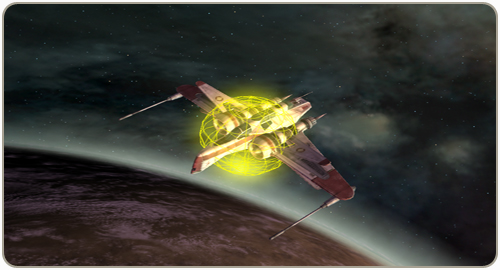
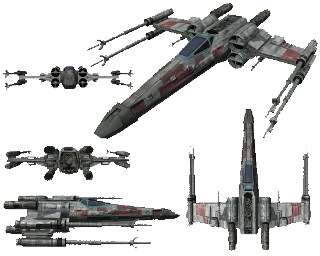
A new TIE defender rockets through space.
One of the most advanced Imperial starfighters, the TIE defender is one of the few Imperial ships built to go toe-to-toe with the Advanced X-wing, leading its pilots to sometimes think the Empire actually cares whether or not they survive their battles. Combined with strong speed and weaponry, the TIE defender is never something Rebel pilots want to see on their tails.

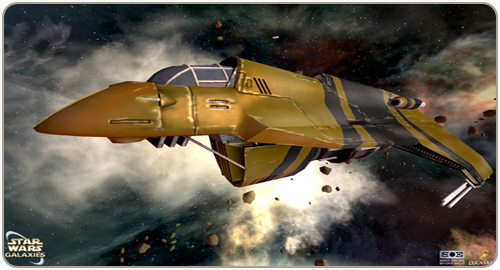
A new H6-Scurrg blasts out of orbit.
Made famous by the pirate Nym, the H6-Scurrg is a fast, solid, and deadly ship. Featuring two front-mounted cannons, a turret, and missile launchers, this ship takes pirating to a new level, and those fortunate enough to pilot one know they stand in a class above.
Publish Notes - 22/03/2010 Space
- Space Factional Presence
- If you are aboard an overt factional ship (can be pilot or passenger), "actively" playing the game, not incapped/dead, of the same faction as the ship (can be on leave, combatant, or special forces), and in a space zone associated with a ground planet (Corellian System, Dantooine System, Dathomir System, Endor System, Karthakk (Lok) System, Naboo System, Tatooine System, and Yavin System), each minute, for risking life and limb to provide factional presence/patrolling the space zone, you will automatically provide a nominal amount of points to the GCW score for your faction for the space zone GCW category of the associated ground planet.
- If you are in the pilot seat, operations chair, or turret, the amount of points contributed is proportionate to the pilot skill, plus a 10% bonus for each GCW rank.
- If you are not in the pilot seat, operations chair, or turret, the amount of points contributed is proportionate to the character level, plus a 10% bonus for each GCW rank.
- The same aligned city bonus (100% bonus, plus a 10% bonus per city rank, plus a 5% bonus per year of city age) is granted if the character's citizenship city is located on the corresponding ground planet and is same faction aligned as the character.
- If the character's citizenship city is located on Rori or Talus, it will be associated with the Naboo System or the Corellian System, respectively, in determining the space factional presence same aligned city bonus.
- Space factional presence and contribution are displayed in the "GCW Factional Presence" and "GCW Personal Contribution" window of the War Terminal and the War IntelPad.
- Duty Missions
- Planetary space stations will now offer additional 'mercenary contract' Destroy Duty missions
- Stations will offer duty missions of an appropriate tier based on the area. In addition they will offer Tier 5 factional duty missions to master pilots.
- You can now spend tokens earned from Space Duty Missions with the Vendor in the Nova Orion cantina
- Duty missions with extra high difficulty and reward can be gotten from Dantooine, Dathomir and Endor stations. Look for the missions that sends you to Kessel.
- Piracy Event
- Rumors of a new small sized interdiction device have been circulating. A certain shady parts dealer might know more.
- The Piracy event will grant underworld faction and a few contraband items to smugglers.
- Factional Commands
- Players can now go Special Forces by using the Special Forces Command
- Using the command to go Special Forces now takes a total of 45 seconds.
- When the command is used, you ship will start blinking on the radar of other ships.
- You will need to remain at a standstill for the first 30 seconds, after that you're free to move around for the remaining 15 seconds.
- Rebels will receive the /spacepvprebel command, imperials will receive the /spacepvpimperial and neutrals will receive both commands.
- The command will also be available in the command browser under the space tab.
- To stop being flagged as Special Forces you will need to land the ship (or die and respawn).
- Neutral pilots can now declare themselves as factional combatants for either the imperial or rebel navy.
- If you're a factional member on the ground you cannot declare support for the opposing faction in space
- You will remain registered with the faction until you land or die and respawn
- Opposing factional ships will now attack you while allied ships will be unattackable.
- Declaring yourself with a faction will allow you to take factional mercenary duty mission at the space stations
- A new space command /spacefaction have been added
- When used it will tell the player what squadron they are part of and what their factional status are.
- The command can either be used as a command (/spacefaction) or through the icon found in the command browser under 'space'.
- Space - Other
- Crafted weapons now have a higher ‘vs. Shields’ and ‘vs. Armor’ rating
- Crafted Shields will now have 3-600 lower RED when crafted (depending on experimentation).
- Removed almost all collection related space spawns. The mobs will now be available through duty missions.
- All factional mobs in Kessel should now count towards the completion of the 'kill 30' pre-master quests.
- You can now repeat the Lord Cyssc quest by talking to Gursan Bryes.
- The quest can be repeated once daily
- Completing the mission will give the player a reward of one of four space weapons that are currently attainable from other non-repeatable quests (The Vengeance Ion Cannon, the Ionic Pulse Cannon, the Trandoshan Repeater and the new Heavy Ionic Pulse Cannon).
- The Nym's Starmap quest series is now repeatable. In order to start the quest series a second time you must have completed all four quests in the series.
- You can repeat the quest daily.
- Destroying the Imperial Star Destroyer or the Rebel Freedom Station in deep space should no longer have any effect on the Kessel System. The faction spawns that were activated by the destruction will now always be active.
- The program size of Engine overload, Weapon overload, Weapon Capacitor Overload and Reactor Overload level 3 and 4 have been reduced by one.
- This change is not retroactive, you will need to remove and re-add the commands to your flight computer or droid to get the new size
Friday Feature – 04/03/2009
With Game Update 9 several of the spaceships in the game have received a number of changes to bring them into balance with other ships.
Here is a quick overview of the changes that can currently be found on the TestCenter and TC-Prime servers!
Ship Improvements
All the numbers given for the ships handling and speed are specific to each of the chassis's described. In addition to the chassis specific numbers, any given ships handling will be further modified by the engine installed and possibly any engine overload running on the ships droid Interface.
Acceleration – This number affects how fast the ship will accelerate to its top speed
Deceleration – How fast the ship can reduce its speed
Yaw and pitch acceleration – How fast the ship reaches its top turn speed. This value will also be affected by the ships current forward speed.
Roll – How fast the ship roll's around its own center point
Please note: All numbers are subject to change during the testing phase.
Rebel Ships
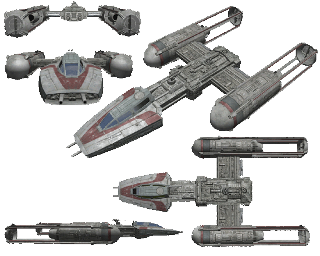
Ship Name: Y-Wing
Faction: Rebel
Category: Turreted Medium Fighter

Ship Name: Y-Wing Longprobe
Faction: Rebel
Category: Bomber
The long probe is the Y-Wing set up in a bomber configuration. While forgoing the turret and suffering a light decrease in its handling characteristics, the Long Probe makes up for this by carrying an additional font mounted gun and an additional missile launcher.
Ship Name: B-Wing
Faction: Rebel
Category: Bomber / Assault fighter
Imperial Ships
Ship Name: Tie Bomber
Faction: Imperial
Category: Bomber
Ship Name: Tie/In
Faction: Imperial
Category: Light Fighter
Freelancer Ships
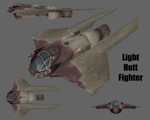
Ship Name: Dune Lizard
Faction: Freelancer
Category: Medium Fighter
Notes: This chassis can now be crafted with a mass up to 130750 as opposed to the previous 86750
Notes: The Hitbox of this chassis have been reduced by approx. 20%, making it harder to hit.
The Dune Lizard has often been considered a poor choice for a combat pilot due to its large size and low mass.
In GU9 the ship has had it's mass drastically increased and it's hitbox reduced, offering pilots more options in how to outfit the ship as well as making it harder for enemy pilots to hit the ship in combat.
Ship Name: Kimogila
Faction: Freelancer
Category: Heavy Fighter
Notes: This chassis can now be crafted with a mass up to 202250 as opposed to the previous 112250
Notes: This ship will now be able to carry an additional missile launcher
Ship Name: Ixiyen
Faction: Freelancer
Category: Medium Fighter
Notes: This chassis can now be crafted with a mass up to 170000 as opposed to the previous 97000
Notes: This ship will now be able to carry an additional missile launcher
Ship Name:Rihkxyrk
Faction: Freelancer
Category: Heavy Fighter
Others
Ship Name: Arc-170
Faction: Rebel (Neutral, Imperial)
Category: Medium Fighter
And here is the hitbox after the change. As you can see the hitbox has been greatly increased in size!
Friday Feature - 11/09/2007
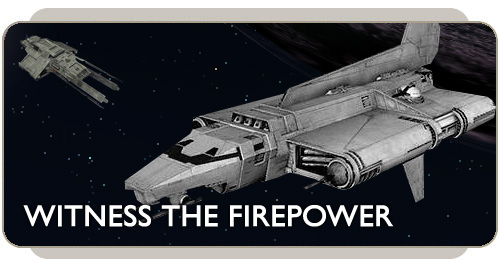
Imperial Assault Gunship
Although this ship might look similar the Lambda-class shuttle at first glance, don't let appearances deceive you. The Galactic Empire uses the Imperial gunship in situations that call for aggressive firepower.
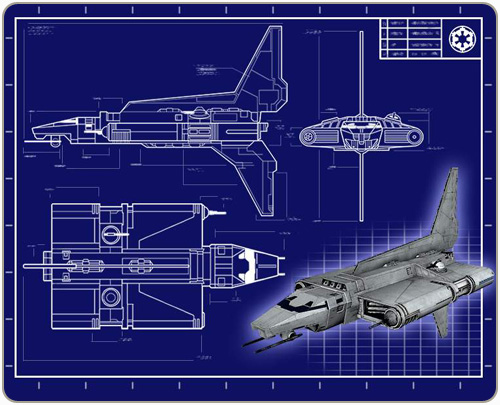
Two forward mounted guns, three forward mounted turrets, in addition to the two turrets on the top and one at the rear of the gunship, pack quite the punch. This combat-ready vessel can seek out and destroy any unsuspecting Rebels in its path.
Rebel Assault Gunship
The gunships employed by the Rebellion are armed to the teeth for occasions when Imperial entanglements cannot be avoided.
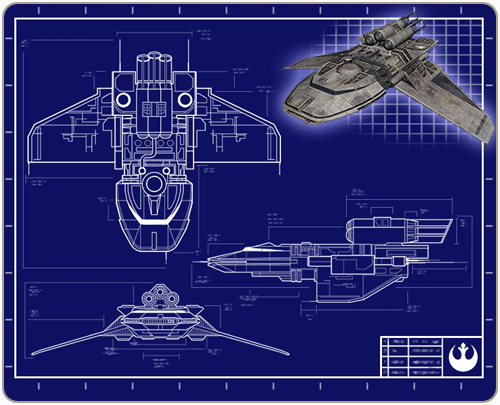
The Incom X4 gunship boasts two forward mounted guns, three mounted turrets on the top, and three mounted turrets on the bottom.
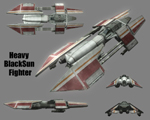
Blacksun AEG-77 Vigo
The Black Sun's transports became a common sight in both the underworld and legitimate shipping with the advent of Xizor Transport Systems. This particular transport class became well known as lightly defended. Pirates from a variety of bands began picking off the freighters, particularly those smuggling illegal cargo for Black Sun.
Instead of dedicating fighters to escort transports carrying valuable cargo, Black Sun began modifying some of their transports to carry heavy firepower and act as escorts for the rest of the convoys. Named after Black Sun's lieutenants, the Vigo, this once-merchant class vessel has been elevated to the status of "gunship."
This gunship comes equipped with two forward mounted guns, four top mounted turrets, and two bottom mounted turrets. The gunship, originally a transport ship, is still large enough to hold a number of items and passengers inside.
Like the gunships employed by neutral factions and Imperials, the Rebel gunship has a spacious interior with more than enough room to stretch your legs. Each gunship consists of multiple levels that can hold a number of items and cargo. Capable of lightspeed, storage, and combat, these gunships can fulfill a variety of needs for pilots and passengers venturing into space.
If you're new to space or a grizzled veteran pilot, these ships have something for everyone. If it's the pure firepower of a gunship you're looking for, or a fully stocked transport taking a journey across the stars, take a spin in the new ships in Chapter 8.
Take to the stars in a ship of your very own in Star wars Galaxies. Pilot your ship through 12 space sectors for any one of 9 different squadrons or master several to become an Ace pilot!

 | Not implemented so far. Timeline must be bend to incorporate it. |
 | A Kuat Drive Yards IMPERIAL-CLASS STAR DESTROYERS (ISD) is a marvel of technology, and testament to the Empire's might. With a length of 1600m, bristling with 100 turbolaser batteries with a range exceeding 1200m. The bridge itself accomodates a large proportion of laser cannons, making a full frontal assault very difficult. An ISD can carry a full Stormtrooper division, 20 AT-ATs, 30 AT-STs, eight Lambda-class shuttles, 12 landing barges and six TIE squadrons. They are found in Deep Space and Ord Mantell. aser cannons. Usually they are escorted by Imperial TIE Fighters. |
Cert: TIER 0 Mass: 12/20/80k (96k) Ac-/Deceleration: 40/50 Speed Modifier: 0.97 (0.98) Pitch/Yaw/Roll: 500/500/250 Weapon/Ordnance: 1G/1M | Sienar Fleet Systems TIE Bomber
Cert: TIER 3 Mass: 190k Ac-/Deceleration: 30/30 Speed Modifier: 0.95 Pitch/Yaw/Roll: 80/80/40 Weapon/Ordnance: 2G/2M |
Cert: TIER 3/4 Mass: 50/80k Ac-/Deceleration: 40/60 Speed Modifier: 1.00 Pitch/Yaw/Roll: 300/300/150 Weapon/Ordnance: 1G/1M |
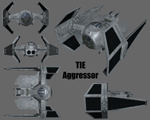
Cert: TIER 4 Mass: 65k Ac-/Deceleration: 40/50 Speed Modifier: 1.00 Pitch/Yaw/Roll: 300/300/150 Weapon/Ordnance: 2G/1M | Sienar Fleet Systems TIE Aggressor
Cert: TIER 4 Mass: 120k Ac-/Deceleration: 20/30 Speed Modifier: 0.95 Pitch/Yaw/Roll: 150/150/75 Weapon/Ordnance: 1G/1T/1M |
Certification: Ace Pilot Mass: 170k Ac-/Deceleration: 35/35 Speed Modifier: 0.90 Pitch/Yaw/Roll: 100/100/50 Weapon/Ordnance: 2G/3M |
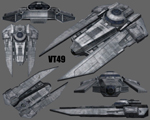
VT49 Decimator
Certification: Ace Pilot Mass: 5000k Ac-/Deceleration: 5/5 Speed Modifier: 0.80 Pitch/Yaw/Roll: 50/50/37.5 Weapon/Ordnance: 2T/3M | YE-4 Assault Gunship
Certification: Ace Pilot Mass: 3000k Ac-/Deceleration: 100/100 Speed Modifier: 0.60 Pitch/Yaw/Roll: 10/10/10 Weapon/Ordnance: 6T/2G/2M | Sienar Fleet Systems & Cygnus Spaceworks Lambda-class shuttle
Cert: NPC Mass: n/a Ac-/Deceleration: n/a Speed Modifier: n/a Pitch/Yaw/Roll: n/a Weapon/Ordnance: n/a |


 | Incom/Subpro Z-95 (standard/heavy)
Cert: TIER 0 Mass: 12/95k Ac-/Deceleration: 50/50 Speed Modifier: 0.95 Pitch/Yaw/Roll: 600/600/300 Weapon/Ordnance: 1G/1M |
| Koensayr BTL-A4 Y-Wing (standard/Longprobe)
Cert: TIER 1/2 Mass: 150/170k Ac-/Deceleration: 25/30 Speed Modifier: 0.90 Pitch/Yaw/Roll: 100/100/50 80/80/40 Weapon/Ordnance: 1G/1T/2M |
|
| Incom T-65 X-Wing standard/advanced)
Cert: TIER 3/4 Mass: 100/180k Ac-/Deceleration: 25/30 Speed Modifier: 0.90 (0.95) Pitch/Yaw/Roll: 300/300/150 Weapon/Ordnance: 3G/1M |
 | Dodonna/Blissex RZ-1 A-Wing
Cert: TIER 4 Mass: 65k Ac-/Deceleration: 40/60 Speed Modifier: 1.00 Pitch/Yaw/Roll: 250/250/125 Weapon/Ordnance: 1G/1M |
 | Slayn & Korpil B-Wing
Cert: Master Pilot Mass: 240k Ac-/Deceleration: 30/35 Speed Modifier: 0.90 Pitch/Yaw/Roll: 75/75/50 Weapon/Ordnance: 4G/2M |
|
| YKL-37R Nova Courier
Cert: Master Pilot Mass: 5000k Ac-/Deceleration: 5/5 Speed Modifier: 0.80 Pitch/Yaw/Roll: 50/50/37.5 Weapon/Ordnance: 2G/3M |
| Incom X4 Gunship
Cert: Master Pilot Mass: 3000k Ac-/Deceleration: 100/100 Speed Modifier: 0.60 Pitch/Yaw/Roll: 10/10/10 Weapon/Ordnance: 6T/2G/2M | Gallofree Yards Medium Transport
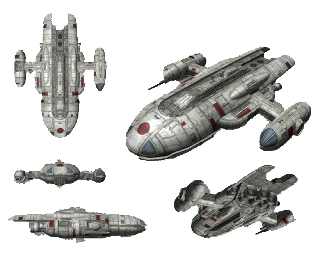
Cert: NPC Mass: n/a Ac-/Deceleration: n/a Speed Modifier: n/a Pitch/Yaw/Roll: n/a Weapon/Ordnance: n/a | Kuat Drive Yards Nebulon Class B Frigate
Cert: NPC Mass: n/a Ac-/Deceleration: n/a Speed Modifier: n/a Pitch/Yaw/Roll: n/a Weapon/Ordnance: 24T |


MandalMotors M3-A Scyk
Cert: TIER 0 Mass: 12k Ac-/Deceleration: 50/50 Speed Modifier: 0.95 Pitch/Yaw/Roll: 600/600/300 Weapon/Ordnance: 1G/1M | MandalMotors G1-M4-C Dunelizard
Cert: TIER 1 Mass: 160k Ac-/Deceleration: 300/350 Speed Modifier: 0.95 Pitch/Yaw/Roll:300/300/150 Weapon/Ordnance: 2G/1M | MandalMotors M12-L Kimogila
Cert: TIER 2 Mass: 202k Ac-/Deceleration: 35/35 Speed Modifier: 0.92 Pitch/Yaw/Roll: 100/100/50 Weapon/Ordnance: 3G/2M |
Black Sun
Cert: TIER 2/4 Mass: 40/150k Ac-/Deceleration: 40/50 Speed Modifier: 1.00 Pitch/Yaw/Roll: 400/400/200 Weapon/Ordnance: 1G/1M | Black Sun
Cert: TIER 3 Mass: 178k Ac-/Deceleration: 350/350 Speed Modifier: 0.95 Pitch/Yaw/Roll:200/200/100 Weapon/Ordnance: 2G/2M | Black Sun
Cert: TIER 4 Mass: 190k Ac-/Deceleration: 400/400 Speed Modifier: 0.97 Pitch/Yaw/Roll: 100/100/50 Weapon/Ordnance: 3G/1M |
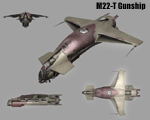
ManadMotors M22-T Krayt
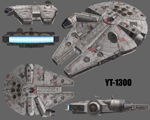
Cert: Master Pilot Mass: 210k Ac-/Deceleration: 50/50 Speed Modifier: 0.92 Pitch/Yaw/Roll: 100/100/50 Weapon/Ordnance: 1T/3G/1M | Corellian Engineering Corporation YT-1300
Cert: Master Pilot Mass: 5000k Ac-/Deceleration: 5/5 Speed Modifier: 0.80 Pitch/Yaw/Roll: 50/50/37.5 Weapon/Ordnance: 2T/2M | Black Sun AEG-77 Vigo Gunship
Cert: Master Pilot Mass: 3000k Ac-/Deceleration: 100/100 Speed Modifier: 0.60 Pitch/Yaw/Roll: 10/10/10 Weapon/Ordnance: 6T/2G/2M |
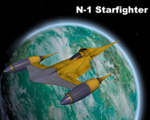
Naboo N-1 Starfighter
Cert: TIER 4 Mass: 65k Ac-/Deceleration: 40/60 Speed Modifier: 1.0 Pitch/Yaw/Roll: 250/250/125 Weapon/Ordnance: 1G/1M | Haor Chall Engineering "Vulture" Droid Fighter
Cert: NPC droids Mass: n/a Ac-/Deceleration: n/a Speed Modifier: n/a Pitch/Yaw/Roll: n/a Weapon/Ordnance: n/a | Corellian Corvette
Cert: NPC Mass: n/a Ac-/Deceleration: n/a Speed Modifier: n/a Pitch/Yaw/Roll: n/a Weapon/Ordnance: 8T |

Incom and Subpro Corporations ARC-170
Cert: TIER 4 Mass: 125k Ac-/Deceleration: 40/50 Speed Modifier: 0.97 (1.00) Pitch/Yaw/Roll: 400/400/200 Weapon/Ordnance: 2T/1G/1M | Feethan Ottraw Scalable Assemblies Belbullab-22
Certification: TIER 4 Mass: 90k Ac-/Deceleration: 50/50 Speed Modifier: 0.95 Pitch/Yaw/Roll: 400/400/200 Weapon/Ordnance: 2G/1M | ETA-2 Actis Interceptor
Certification: TIER 4 Mass: 90k Ac-/Deceleration: 50/50 Speed Modifier: 0.95 (1.00) Pitch/Yaw/Roll: 400/400/200 Weapon/Ordnance: 2G/1M |
 | Kuat Systems Engineering Alpha-3 Nimbus-class V-Wing
Cert: TIER 4 Mass: 65k Ac-/Deceleration: 40/60 Speed Modifier: 1.0 Pitch/Yaw/Roll: 250/250/125 Weapon/Ordnance: 1G/1M |
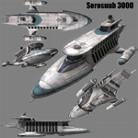
Sorosuub 3000 Luxury Yacht
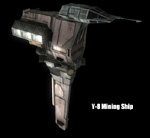
Certification: TIER 0 Mass: n/a Ac-/Deceleration: 50/50 Speed Modifier: n/a Pitch/Yaw/Roll: 50/50/25 Weapon/Ordnance: n/a | Corellian Engineering Corporation Y-8 Mining Vessel
Certification: Ace Pilot / Master Pilot Mass: 5000k Ac-/Deceleration: 5/5 Speed Modifier: 0.80 Pitch/Yaw/Roll: 75/75/50 Weapon/Ordnance: 4T/1G/1M |
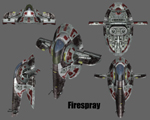
Kuat Systems Engineering Firespray Cert: Ace Pilot / Master Pilot Mass: 210k Ac-/Deceleration: 15/25 Speed Modifier: 0.90 Pitch/Yaw/Roll: 75/75/40 Weapon/Ordnance: 2G/2M | Corellian Engineering Corporation YT-2400 Transport
Cert: Ace Pilot / Master Pilot Mass: 5000k Ac-/Deceleration: 5/5 Speed Modifier: 0.80 Pitch/Yaw/Roll: 50/50/37.5 Weapon/Ordnance: 2G/2M |
Explanations:
Certification: The tier you need to fly the ship
Mass: Its approximate mass (limits the mass you can equip your ship with...A CHALLENGE TO MASTER)
Acceleration/Deceleration: This is the acceleration/deceleration of the ship, how quick your ship will increase its forward velocity / how fast it stops. The higher the better.
Speed Modifier: This is the speed modifier. It is simple enough to use, have a look at your chassis mod (in this case 1.0) and multiply your engines top speed by it then multiply by 10 for the actual speed.
Pitch/Yaw/Roll: These effect how fast your ship turns, BUT that is also dependent of the engine you use...in otherwords the chassis responsiveness/maneuverability. The higher, the better. But remember...even a high PYR engine won't make a fast turner out of a TIE Bomber!
Weapon/Ordnance: G = guns used by pilot / T = Turrets used by crew / M = ordnance (missile slots)
Component Basics:
Lower number = better
- Droid interface speed - Time multiplier it takes for your droid program to "clear"
- Booster Energy consumption rate - How much energy is used per second during boosting
- Weapon Energy drain per shot - How much capacitor energy is used per shot
- Weapon/Missiles Firing rate - How fast you can refire a weapon
- Reactor energy drain - How much reactor energy is used by the part
Higher number = better
- Booster Accelleration - How quickly the booster will accelerate your ship
- Armour points - How much damage your part can take before taking HP damage
- Armour and Shield Effectiveness (weapon and ordnance) - Damage multiplier against armour/shields
- Shiled Front and Rear Hitpoints - How much damage your shields can absorb
- Max energy (capacitors and boosters) - Energy reservoir to be drawn on
- Min and max Damage (weapon and ordnance) - Weapons minimum and maximum base damge
- Reactor generation rate - How much reactor energy your ship puts out
- Recharge Rate (capacitors, boosters, and shields) - How quickly the part will recharge
- Engine Roll - "rotate"
- Engine Pitch - "up / down"
- Engine Yaw - "left / right"
- Engine Top Speed (engine and booster) - top speed when multiplied with 10 with a factor 1.00
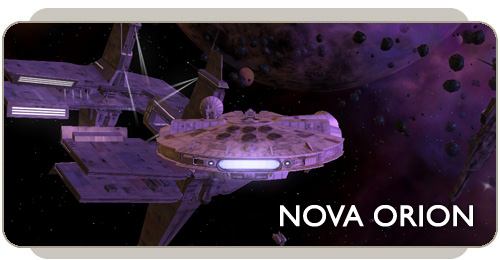
Nova Orion Industries is based out of a space station known as the Nova Orion Station. This new station serves as a hub for an exciting new quest series in Chapter 8.
Nova Orion Industries
Nova Orion Industries is a starship research and development company that was started by Jonas Nova and Garrick Orion. From humble origins, the company grew to become a galactic level producer of starships and space stations.
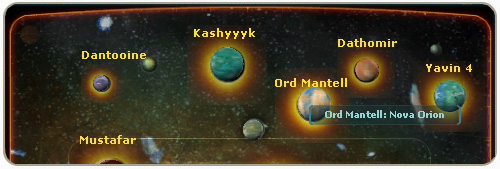
The Nova Orion Station is a virtual twin to the Tansarii Point Station, which was also created by Nova Orion Industries. Both stations are located in Ord Mantell space.
Conflict at Nova Orion
When master pilots reach Nova Orion, they will discover a crisis that is tearing the friendship of Jonas Nova and Garrick Orion apart.
Nova and Orion started as close friends, but in recent years their friendship has become a bit rocky. Suspicion and mistrust grew as the two entrepreneurs started to work on various projects without the knowledge of the other. You can choose to side with Jonas Nova or Garrick Orion, and each side in the conflict will have its own set of quests.
You may, if you choose, switch sides, but doing so will cause you to start over at the beginning for the other side and to lose all of the progress you made previously.
The entire quest series is repeatable as a whole. Each time, you start from the beginning and must again work your way through the entire series. You can choose either of the two factions when the time comes to make that choice, regardless of who you have aided in the past.
Midlithe Crystal
Nova Orion Industries is looking for pilots to gather a space mineral known as midlithe crystal. Researchers on the station are experimenting with the substance in podracers and speeders, but the crystal seems to be unstable and requires further research.
Midlithe crystal is desired by specific employees of Nova Orion Industries. They are willing to trade various amounts of midlithe crystal for schematics or to aid your advancement in the company.
As you progress through the quest storyline, in order to move to the next rank, you will need to be "certified" within the company to become eligible for advancement. The certification process is long and arduous, but the NPC who handles certification is willing to overlook some company regulations and help fast track your certification in return for large amounts of midlithe crystal. You'll need the certification he supplies to advance to rank 2, 3, and 4.
Choose a side and play a part in the events unfolding at Nova Orion!
-- On patrol in the Bright Jewel Systems Cluster, near the planet Ord Mantell--
An R-4 droid started making its standard bleeps and whirrs, attracting the attention of the pilot.
"What is it R-4?" Major Dalgas said as the droid continued expressing itself noisily.
"Ok, open the communications channel," he said with a sigh. He always dreaded when the commander contacted him off-world. It almost always meant that something was going to ruin his day.
"Major Dalgas, I'm glad I was able to get a hold of you before you jumped. We need you to head to a new assignment in the outer rim. I will give you the jump coordinates and you will be briefed once you arrive," the voice said over the com.
The Major tried to interject, "But I was just heading to the Kessel system..."
The commander promptly cut him off, "--All previous orders are irrelevant. It's urgent that you get to your destination as soon as possible."
"All Right, I'm on my way," he said grumbling under his voice.
"Command out!" and with a click the communication ended. Major Dalgas told his astro droid to lay in a course and prepare to jump. Seconds later they were on their way to Deep Space, a region of the Outer rim with few star systems and even fewer places to have a drink.
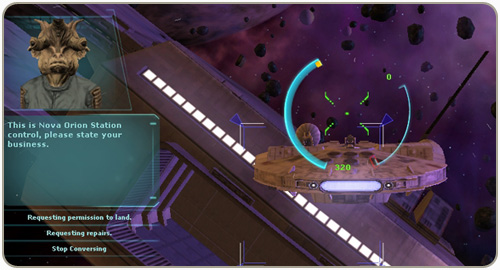
Upon exiting hyperspace, he headed to the coordinates given. In the distance he could see a Rebel Alliance Space Station. As soon as he got within range, he was promptly asked for codes and clearances. While waiting for the green light, he took the opportunity to do a fly around of the station. It was not a new station, but he could tell it had recently been retrofitted. There were parts that had new armoring which contrasted sharply to the worn, older sections. After what seemed like ages, he was cleared to land.
Upon landing, he was greeted by a Rebel Officer in a Commander's Uniform.
"Welcome to Freedom Station Major. Please come this way."
They walked down several hallways and took a lift a few levels up. When they exited the last lift, they entered what appeared to be a command center. There were several holo-displays as well as various computer banks and terminals around the perimeter of the room. They approached a General standing in front of one of the terminals.
"Sir! This is Major Dalgas." They saluted each other.
"Welcome to Freedom Station. I am General Rueb." Major Dalagas Saluted her.
"It's a pleasure to be aboard, Sir! This is quite a station you have here."
"Thank you. Freedom station has just recently been re-commissioned after a long downtime due to some serious battle damage. It's good to have new faces around here. As you will find out, most of the crew is new, but few of them are pilots. You are only the 2nd one to arrive. We were told that we should have enough for a full squad within two days. Hopefully, that will be soon enough," she said.
The General took a few steps over to a holo display of the sector. She motioned for Major Dalgas to join her.
"This section of space is part of an important travel route for the Empire. This station serves as a launching point for us to intercept and in some cases, disrupt and destroy any Imperial traffic that we can. The station has been out of commission for many months due to a bad battle with the Empire. They failed to destroy the station, but they did disable us. It has taken all this time to refit it for use again. Your role will be leading a wing of our interception force." She paused a moment and then continued, "We also have word that there is a new Star Destroyer heading this way. It will arrive in our system very soon so we need to be prepared. I'm glad you are here, but I sure hope you are ready for action. You will be getting plenty of it!"
With a smile on his face, Major Dalgas saluted and replied. "Yes Sir! I've always wanted to have a chunk of star destroyer for my trophy collection!"
"Don't get too cocky, but your enthusiasm is welcome and I look forward to your success. You are dismissed. Enjoy your free time now. There won't be much left soon enough." She returned his salute and smiled as he left the command center. "They all start so energetic," she said with a sigh. "Maybe this one will make a difference."
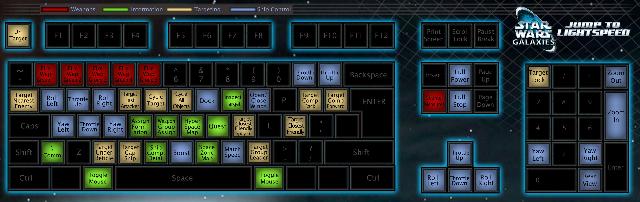
Friday Feature 29/10/2004 - Jump to Lightspeed: Printable Keyboard #2
We have two more printable keyboard maps you can download and print.
Last week's keyboards were a basic "getting started" keyboard. This keyboard has all of the commands listed except for two which wouldn't fit on the graphic, which are:
CTRL / = Autolevel
Shift TAB = Target Closest Enemy Player
These are very useful to have near your keyboard or viewable somehwere around your monitor. Right click the pictures and select save target as to download to your computer or you can just open in your browser if it supports pdf files.
Understanding Ship Components
Here is a guide to understanding components and the basics of how to interpret the stats for all the parts you will need for your ship:
Ship Component Management Window
The first set of numbers appears in the lower right of the Ship Component Management Window, underneath the picture of your ship.
Mass
The number on the right represents the "Mass Capacity" of a ship. Each component has a mass value that contributes to filling up the mass capacity of a ship. The number on the left represents the total mass of all installed components on a ship.
Energy
The number on the right is the same as your Reactor's "Reactor Generation Rate"- - it is the amount of energy produced by your reactor at any given time. Every component installed on a ship requires a certain part of that generation rate. The total "Reactor Energy Drain" of all installed components is the number displayed on the left.Chassis
This is simply the Current/Total hitpoints of your starfighter.
Main Reactor
This component provides your starship with raw power.
Armor
Armor points are depleted before hit points when calculating damage.
Hitpoints
Hitpoints are depleted after the shields and armor is gone. This number also decays when
a component is repaired at a rate of 1pt per 10 pts repaired.Mass
Mass represents the amount of mass that this component will subtract from the total amount of mass your ship can handle.Reactor Regeneration Rate
This is the amount of energy your reactor can produce. It is the same as the amount of Energy listed on your Ship Component Management screen
Engine
This component controls your starship's flight performance.
Armor
Armor points are depleted before hit points when calculating damage.
Hitpoints
Hitpoints are depleted after the shields and armor is gone. This number also decays when
a component is repaired at a rate of 1pt per 10 pts repaired.Reactor Energy Drain
This is the amount of reactor regeneration drain that the component will demand of your reactor.
Mass
Mass represents the amount of mass that this component will subtract from the total amount of mass your ship can handle.Pitch Rate Max
Pitch is the rise and fall of the bow of your space craft. This number represents the maximum pitch acceleration of a ship. A higher number means the engine will be nimble and maneuverable, but these factors are limited by the chassis type.Yaw Rate Max
Yaw is your craft's side to side movement. This number represents the maximum yaw of a ship. A higher number means the engine will be nimble and maneuverable, but these factors are limited by the chassis type as well.Roll Rate Max
Roll is your ship's ability to roll on an axis from side to side. This number represents the maximum ability of your ship to roll. A higher number means the engine will be nimble and maneuverable, but these factors are limited by the chassis type also.Engine Top Speed
This is the top speed of the engine. Move the decimal place one point to the right to get the speed figure that is displayed on your space HUD. Some chassis have additional modifers that can reduce the overall speed depending on the chassis type.
Shield
Your shield generator is your first line of defense against enemy weapons fire.
Armor
Armor points are depleted before hit points when calculating damage.
Hitpoints
Hitpoints are depleted after the shields and armor is gone. This number also decays when
a component is repaired at a rate of 1pt per 10 pts repaired.Reactor Energy Drain
This is the amount of reactor regeneration drain that the component will demand of your reactor.
Mass
Mass represents the amount of mass that this component will subtract from the total amount of mass your ship can handle.Front Shield Hitpoints
Current/Max forward shield hitpoints. Shield hitpoints are the first thing depleted by incoming blaster fire. Armor damage will be done only after the shields from the front or back have been completely depleted.Back Shield Hitpoints
Current/Max rear shield hitpoints. Shield hitpoints are the first thing depleted by incoming blaster fire. Armor damage will be done only after the shields from the front or back have been completely depleted.Shield Recharge Rate
When your shield points are depleted, they will begin to recharge themselves at the rate of X
points per second, where X is the Shield Recharge Rate value.
Front Armor
This is your starship's armor plating. It is the second layer of defense behind your ship's shields. Front armor defends the front half of your spaceship.
Armor
Armor points are depleted before hit points when calculating damage.
Hitpoints
Hitpoints are depleted after the shields and armor is gone. This number also decays when
a component is repaired at a rate of 1pt per 10 pts repaired.Mass
Mass represents the amount of mass that this component will subtract from the total amount of mass your ship can handle.
Rear Armor
This is your starship's armor plating. It is the second layer of defense behind your ship's shields. Rear armor defends the back half of your spaceship.
Armor
Armor points are depleted before hit points when calculating damage.
Hitpoints
Hitpoints are depleted after the shields and armor is gone. This number also decays when
a component is repaired at a rate of 1pt per 10 pts repaired.Mass
Mass represents the amount of mass that this component will subtract from the total amount of mass your ship can handle.
Capacitor
Capacitors are used to store the energy that powers starfighter weapon systems.
Armor
Armor points are depleted before hit points when calculating damage.
Hitpoints
Hitpoints are depleted after the shields and armor is gone. This number also decays when
a component is repaired at a rate of 1pt per 10 pts repaired.Reactor Energy Drain
This is the amount of reactor regeneration drain that the component will demand of your reactor.Mass
Mass represents the amount of mass that this component will subtract from the total amount of mass your ship can handle.Capacitor Energy
Every shot you take with a projectile weapon drains some amount of energy from your capacitors reserve. These numbers are Current/Max capacitor energy reserve. When the capacitor is depleted, you cannot fire projectile weapons again until it has recharged.Recharge Rate
The capacitor energy reserve is recharged at a rate of X per second, where X is the Capacitor Recharge Rate.
Booster
Adding a booster can give your ship an extra, temporary boost of speed.
Armor
Armor points are depleted before hit points when calculating damage.
Hitpoints
Hitpoints are depleted after the shields and armor is gone. This number also decays when
a component is repaired at a rate of 1pt per 10 pts repaired.Reactor Energy Drain
This is the amount of reactor regeneration drain that the component will demand of your reactor.Booster Energy
Booster energy is represented as a X/Y value, where X is current energy and Y is max energy. Booster energy is consumed by the Booster Energy Consumption rate when boosters are engaged.Booster Recharge Rate
Booster energy reserves are recharged at a rate of X units per second, where X is the Booster Recharge Rate.Booster Energy Consumption Rate
This is the consumption rate of a booster's energy reserve while the booster is engaged. Energy is drained from the reserve at X units per second, where X is the Consumption Rate.Acceleration
Higher number = better. This number influences how quickly the booster's speed enhancement accelerates you.Top Booster Speed
Higher number = better. This number adds to your engine speed when the booster is engaged to give you a faster top speed.
Droid Interface
This ship component will allow you to equip a flight computer or astromech droid on your starship. These can be used to control your ship's subsystems.
Armor
Armor points are depleted before hit points when calculating damage.
Hitpoints
Hitpoints are depleted after the shields and armor is gone. This number also decays when
a component is repaired at a rate of 1pt per 10 pts repaired.Reactor Energy Drain
This is the amount of reactor regeneration drain that the component will demand of your reactor.Mass
Mass represents the amount of mass that this component will subtract from the total amount of mass your ship can handle.Droid Command Speed Lower number = better. This represents the delay between issuing droid commands. A lower number means less delay.
Weapon
Ship weapons are used to destroy enemy ships. The weapon is powered by both a capacitor and your ship's reactor. Every shot will drain energy from your capacitor. The capacitor energy reserve is recharged at a rate of X per second, where X is the Capacitor Recharge Rate (as seen above).
Armor
Armor points are depleted before hit points when calculating damage.
Hitpoints
Hitpoints are depleted after the shields and armor is gone. This number also decays when
a component is repaired at a rate of 1pt per 10 pts repaired.Reactor Energy Drain
This is the amount of reactor regeneration drain that the component will demand of your reactor.Mass
Mass represents the amount of mass that this component will subtract from the total amount of mass your ship can handle.Damage
Min Damage / Max Damage per shot. This represents the minimum/maximum range of damage output your weapons will provide.Vs. Shields
This is a weapons modifier vs. shields. If the statistic listed a number of 0.47, your weapon would do 47% of its damage versus shield hitpoints. This number is considerably higher for ion cannons and lower for disruptors. A number of greater than 1.0 would mean you actually do EXTRA damage to that component.Vs. Armor
This is a weapons modifier vs. armor. If the statistic listed a number of 0.47, your weapon would do 47% of its damage versus armor hitpoints. This number is considerably higher for disruptors and lower for ion cannons. A number of greater than 1.0 would mean you actually do EXTRA damage to that component.(Ion Cannons puncture shields, Disruptors puncture Armor and blasters are not as effective as either, but do both.)
Energy / Shots
This is the weapon's drain-per-shot on the Capacitor Energy reserves of your ship. If your capacitor doesn't have this much stored up, you can't fire.Refire Rate
This is the time delay between shots from a projectile weapon. A lower number is better.
Ordnance
Ordnance stats are all the same as weapons, except for "Ammo Count" on missile launchers, which shows the displayed missile quantity loaded in that launcher, and "Ammo" on missile packs, which is how much that pack will load into a launcher.
Countermeasure Launcher
Countermeasure Launcher stats are the same as Ordnance stats, except that Damage has been replaced by Effectiveness. For Effectiveness, a higher number = better. This represents a player's "saving throw" of spoofing an incoming missile .
Droid / Flight Computer
The characteristics of a droid/flight computer are determined by the programmable chip that is installed into the droid itself. A droid engineer can make these chips, and pilots can program them.
Good luck and good hunting!
Imperial Reward Components:
Throughout your grind to Imperial Ace Pilot you will be rewarded several items, be careful not to delete them as most of the ship parts are quite useful, either as direct equipment or for later RE-projects.
Start: Tie Fighter Flightsuit / Helmet
Final: ACE Jacket / Helmet
Tier 2, 1st mission: Cygnus "Starblaster" Disruptor RE Lvl: 4
Tier 2, 2nd mission: Sienar Fleet Systems Light Military Grade Durasteel RE Lvl: 4
Tier 2, 3rd mission: Republic Sienar System Ion Booster RE Lvl: 4
Tier 2, 4th mission: Rendili Dual-Projector Shield Generator RE Lvl: 4
Tier 3, 1st mission: Rendili "K-Class" Weapon Capacitor RE Lvl: 6
Tier 3, 2nd mission: Sienar Fleet Systems Military Grade Droid Interface RE Lvl: 6
Tier 3, 3rd mission: Sienar Design Systems High-Output Reactor RE lvl: 6
Tier 3: 4th mission: Cygnus "Megadrive" Starship Engine RE Lvl: 6
Tier 4, 1st mission: Sienar Design Systems "Boltdriver" RE Lvl: 7
Tier 4, 2nd mission: Cygnus "Holoscreen" Shield Generator RE Lvl: 8
Tier 4, 3rd mission: Republic Sienar Systems Special Durasteel RE Lvl: 8
Tier 4, 4th mission: Republic Sienar Systems Advanced Military Grade Reactor RE Lvl: 8
Jump to Lightspeed: Getting Started as an Imperial Pilot
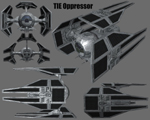
Many claim that the Empire's greatest strength is its ready supply of talented and ruthless pilots. The Imperial Pilot serves the Emperor, battling Rebels, pirates, and others who threaten Imperial rule. An Imperial Pilot is expected to become proficient with the Empire's signature craft: the TIE fighter. Advanced pilots gain the right to fly TIE variants, including the deadly TIE Interceptor and experimental TIE Aggressor. The Imperial training program requires Imperial Pilots to master proven Imperial Navy tactics and become well-versed in the use of special navi-computer programs that enhance starfighter performance.
Imperial Pilots are devoted to winning the Galactic Civil War. They undertake some of the most dangerous missions in the galaxy and continually exterminate Rebel forces wherever they are found.

Join the Imperial Navy!
Once a player begins Jump to Lightspeed, we want players to be able to get into the fun quick and easy and also to feel like they are being drawn into the Star Wars experience. The first thing that will happen to you is you will receive three email messages. As the various factions try to gain your favor, they will contact you within the first few moments of the game by sending you a message. Each recruitment message is tailored to their presence in the galaxy and will give you a chance to scope out who's who.

Once you have made a decision, you should save the waypoint to your datapad, take a moment and find out what planet and city the recruiter is and travel to meet your contact.

Finding your Space Quest Trainer
- Travel to Tatooine, Naboo, or Corellia as it is listed on your datapad. Highlight the attachment included in your recruitment email and it will list the planet you need to be on.
NOTE: There are no beginning Space Quest Trainers on any planets other than Tatooine, Naboo and Corellia. If you are not on one of these worlds, you will need to travel to the correct planet before you can begin searching for them using the planetary map as described below.
- Open the planetary map (CTRL+V by default).

Tip: If you save your email attachment from the recruiter, when you open your planetary map (CTRL+V by default), you will see the waypoint on the planetary map. Further, if you activate your waypoint attachment, the planetary map pointer will also be lighted. This will make finding your Space Quest trainer more accommodating.

Acquiring a New Profession


Once you see the recruiter, he will help you choose your assignment and send you to the pilot trainer. The pilot trainer will give you your novice pilot box. Your recruiter will give you the next waypoint on your journey. You can find out the location of the pilot trainer and travel to his or her location in the same fashion that you found the recruiter.
Finding your Space Quest Trainer
If you accidentally delete your waypoint to the Space Quest Trainer, you can use this method to re-locate your chosen trainer.
Follow the waypoint indicator - the blue arrow on your radar - to your trainer. As you near the waypoint, it will become visible as a beacon of bluish light on the horizon.
Gaining your first Pilot Skill box
To gain your first piloting skills, you'll need to talk to your Trainer. You can automatically start a conversation by double-clicking on the Trainer or using the radial menu and choosing the "Converse" option.

Once you've started a dialogue, follow the conversation options to sign up for your Novice Piloting skill box. Upon receiving your Novice Piloting skill box, you'll earn at least one starship certification (which gives you "license" to pilot a specific type of ship) and your "starter ship".


Imperial Pilot Commands
As you advance in your chosen profession, you will gain access to special commands that you can execute during combat. All commands are skill based; meaning that the more levels of ability (Pilot Special Tactics skill modifier) the pilot has, the more easily the command can be executed successfully.
With most abilities, there is a period of time that must elapse before the pilot can use another one. This is shorter for simpler commands, and longer for more complicated ones. The tactical training that Imperial pilots receive is second-to-none. As Imperial Pilots advance, they will learn new performance-enhancing commands and gain the ability to call in support craft for aid.
Pump Reactor
/pumpreactor
The pilot attempts to overcharge his reactor's reactant injectors and squeeze some extra juice out of the generator. This will increase overall available power to some degree. At the same time, the pilot overloads the output coils leading to the ion drive units, producing additional available thrust over normal operating parameters. When the pilot does this, there is a risk of the automated flight control systems detecting the overload as a threat and shutting the system down, or "scramming" the reactor. If the reactor scrams, the ship will basically shut down until the systems automatically reset.
The additional power and speed provided by this tweak are very handy in a space dogfight, but sitting motionless in space while you wait for your reactor to re-ignite can be deadly. Thus only the more daring pilots are known to attempt this feat with any regularity.
Running this command increases the power available to all ship subsystems, and ship speed. A failure to run the command will shut the ship down; and the greater the failure, the longer the downtime.
Emergency Weapons
/eweapons
This ability allows the pilot to temporarily circumvent the ship's normal power distribution parameters and instead dump all power normally meant for recharging the ship's shields into weapons instead. Note that this doesn't increase how much damage the weapons do, but instead how much power for recharge is available to them. Shunting shield power directly to the weapons allows firing bursts of extended lengths, at the cost of recharging the damage deflection screens.
Running this command temporarily shuts down recharge for the shields and increases the weapon capacitor recharge rate dramatically. A failure to run the command will shut the ship down; and the greater the failure, the longer the downtime.
Bomber Strike 1
/bstrike1
Although not in command of a strike force themselves, pilots can, from time to time, call for assistance on standard Imperial command frequencies. If local non-assigned strike assets are available, they will be routed to the pilot's locale where they will engage the requested target. Once the target is destroyed, or extreme casualties have been suffered by the strike package or its escort, the vessels will leave the area. A skilled pilot will be able to convince the local kill-zone Controller into giving him higher quality assets in the package, increasing their chance for success and survival.
To run the Bomber Strike, select a target, and type /bstrike1. If it's something you could attack and a skill check is passed, a strike package will arrive and engage the target squad. Once the target, the strike package, or the strike package's escort is destroyed, the remnants of the strike package will leave the area. The success level of the pilot's skill check will affect the types of ships in the strike package.
Bomber Strike 2
/bstrike2
Identical to the Bomber Strike 1 command, except the pilot's career growth has granted him access to a larger strike force.
Bomber Strike 3
/bstrike3
Identical to the Bomber Strike 2 command, except the pilot's career growth has granted him access to an even larger strike force.
Victory for the Empire!
As with An Empire Divided, your character can learn new professions in-game. All four of the new professions can be gained after character creation by interacting with an appropriate Non-Player Character (or NPC), usually called a "Trainer." Trainers can teach you the basic piloting skills (or Novice Shipwright). In addition to a novice skill, pilot trainers (also called "Space Quest Trainers") can provide you with the certification necessary to fly your first starfighter and dole out missions that will earn you credits, experience, and the opportunity to advance in your chosen Pilot profession.
Each pilot type has specific trainers. If you want to be an Imperial Pilot, you should talk to an Imperial Space Quest Trainer. These trainers are located in major cities on Tatooine, Naboo, and Corellia. Your recruitment email will give you the first waypoint and then when you sign up with the recruiter, he or she will give you your next waypoint which will direct you to the pilot trainer. Space Quest Trainers will only train like-faction or neutral players. For instance, if your character is a declared "Imperial", she will not be able to learn Imperial Piloting skills from a Rebel Space Quest Trainer, and vice-versa.
Shield Adjust Front/Back - Increases max energy of F/B Shields sacrificing B/F Energy.
Shield Reinforcement F/B - Moves Shield Energy from B/F shields to F/B shields.
Neutral Commands:
Capacitor To Shield Shunt (CTSS) - Moves Energy from your capacitor Reinforcing your shields.
Weapon Capacitor Overcharge (CO) - Increases the recharge rate and Max Capacitor Energy. Reactor Overload - Increases the reactor generation rate of your reactor.
Imperial Commands:
Weapon Overload (WO) - Increases the damage output of your weapons but also increases the Reactor Energy Drain and Energy Per Shot.
Weapon Tuning - Opposite of WO Engine Overload (EO) - Increases the Pitch Yaw Roll and Top Speed Of the engine but also increases the Reactor Energy Drain Engine Tuning - Opposite of EO
How can I program other factions commands:
If you are programming a droid you can trade the droid to someone of the faction with the command and they can program it for you. If you have a FC then you need to get an unprogrammed droid command chip and get a person fo the right faction to program that for you. Then you will temporarily be able to program that whilst it is in your inventory.
How long does it take to run a program?
This is determined by your droid interface and its droid command speed. The lower the speed the faster the droid is. Overload Droid commands will take (5 X [Droid interface speed]) to complete. Shield adjust front I believe has a (3 x [DI Speed]). I am not sure on time on overcharge tbh I think it has (4 x [DI Speed]) but dont remember. Capacitor To shield Shunt is (1 x [DI Speed])
How much room does each lvl droid/fc have and how much per program?
Droids: Level 1: 20 Level 2: 40 Level 3: 70 Level 4: 110 Level 5: 125 Level 6: 150 Commands: Level 1: 5 Level 2: 10 Level 3: 20 Level 4: 25
How much of an effect will the programs have?
RO1: 15% Increase RO2: 30% Increase RO3: 60% Increase RO4: 90% Increase CO4: X2 Bonus EO3: 30% TS Increase and PYR increase. 333% RED EO4: 40% TS Increase and PYR increase. 1000% RED WO1 150% damage, 143% EPS / RED WO2 200% damage, 200% EPS / RED WO3 250% damage, 284% EPS / RED WO4 300% damage, 500% EPS / RED
Jump to Lightspeed: Getting Started 10/01/2004
For this week's Friday Feature, we have a snapshot look at the quick start guide for getting into the Jump to Lightspeed:
Somewhere in the Outer Rim...
1) Go visit a novice Space Quest Trainer on Tatooine, Corellia, or Naboo. You can find 'em all on the planetary maps. Once you talk to this trainer, you'll get:
* A Novice piloting skill
* Certification for your first starship
* Your first starship (in your datapad)
2) Talk to your Space Quest Trainer to get your first Mission.
3) Head to the nearest starport and use the Starship Terminal inside to launch directly into space.
4) To control your ship:
* Mouse: Control heading
* Mouse 1: Fire primary weapons
* Mouse 2: Fire secondary weapon
* Mouse Wheel: Zoom in/out
* 'W' / Up arrow: Increase speed setting
* 'S' / Down arrow: Decrease speed setting
* 'Q' / Left arrow: Roll your ship counter-clockwise
* 'E' / Right arrow: Roll your ship clockwise
* 'A'/Numpad 1: Yaw left
* 'D'/Numpad 3: Yaw right
TAB: Cycle through targets
Note: You can also use a flight stick or a gamepad to control your ship. Once your computer is set up to see the game controller, you can either use the default buttons or re-map them all to suit your tastes using the Options window (CTRL-O).
5) Follow the flashing white triangles on your radar and white arrows on your HUD to your first waypoint.
6) Blast anything that gets in your way! Line up your target in your reticle and pull the trigger (Mouse 1 by default). You may need to "lead" your target by firing just in front of the enemy craft. Take advantage of the "leading target reticle" to help hit fast moving targets.
7) You can always land by visiting any nearby Space Station (available through your Star System Map). Target the station ("C" by default) and choose from a list of available destinations.
8) If you get destroyed in space, you retain your starship in your datapad, but it might need repairs. Once you have had it repaired, examine the ship before heading out into space again to make sure your ship is purring like a Gurrcat.
9) You can always repair your starship at a space station for a fee.
Taking your existing Star Wars Galaxies character into space...
Once Jump to Lightspeed has been successfully installed, your existing Galaxies characters will be able to learn special piloting skills, own starships, and continue their Star Wars adventure in space!
New Professions
Jump to Lightspeed allows players to explore four new professions, all involving starships. Through these new professions, you can become an Alliance starfighter pilot or a master starship-builder, a mercenary privateer or an Imperial TIE ace.
Alliance Pilot
The Alliance Pilot serves the Rebel Alliance, the ragtag coalition of heroes who oppose the tyranny of the Galactic Empire. As an Alliance pilot, you will have access to a wide range of powerful starships, including the versatile X-wing and the incredibly fast A-wing. Alliance pilots also learn special Rebel piloting techniques and custom astromech programs that improve a starfighter's defensive capabilities and other features.
Because the Rebel Alliance is embroiled in a violent war with the Empire, the life of an Alliance Pilot is fraught with danger. If you start down this path, you can expect to clash with Imperial forces on a regular basis.
Imperial Pilot
Many claim that the Empire's greatest strength is its ready supply of talented and ruthless pilots. The Imperial Pilot serves the Emperor, battling Rebels, pirates, and others who threaten Imperial rule. An Imperial Pilot is expected to become proficient with the Empire's signature craft: the TIE fighter. Advanced pilots gain the right to fly TIE variants, including the deadly TIE Interceptor and experimental TIE Aggressor. The Imperial training program requires Imperial Pilots to master proven Imperial Navy tactics and become well-versed in the use of special navi-computer programs that enhance starfighter performance.
Imperial Pilots are devoted to winning the Galactic Civil War. They will undertake some of the most dangerous missions in the galaxy and continually engage Rebel forces wherever they are found.
Privateer
A Privateer is effectively a mercenary pilot. Loyal to neither the Rebel Alliance nor the Galactic Empire, most Privateers are willing to fly missions for any group with enough credits. Privateers might find themselves working for the Smuggler's Alliance on Tatooine, the Corellian Security Forces (CorSec), or even the Royal Security Forces (RSF) of Naboo. Privateers utilize a variety of craft, including those originally designed for criminal groups such as the Hutts and (*classified*). Through rigorous training and various underworld contacts, Privateers learn exotic piloting techniques and master black-market droid programs.
The life of a Privateer involves a great deal of conflict. Privateers who work for reputable groups might find themselves policing systems and battling pirates. When running missions for the Hutts or the Smuggler's Alliance, a Privateer is likely to run afoul of local authorities or even the Empire.
Shipwright
Shipwrights are talented engineers who build starships and starship components, including weapons and engines. Perhaps more importantly, Shipwrights can learn to reverse-engineer equipment discovered in space. A Shipwright with a steady supply of parts to disassemble and a desire to experiment can produce an array of powerful components.
Acquiring a New Profession
As with An Empire Divided, your character can learn new professions in-game. All four of the new professions can be gained training your existing character or after character creation by interacting with an appropriate Non-Player Character, usually called a "Trainer." Trainers can teach you the basic piloting skills (or Novice Shipwright). In addition to a novice skill, pilot trainers (also called "Space Quest Trainers") can provide you with the certification necessary to fly your first starfighter and dole out missions that will earn you credits, experience, and the opportunity to advance in your chosen Pilot profession.
Remember, if you have a seasoned Star Wars Galaxies character, you do not need to create a new character to acquire any of the new Jump to Lightspeed professions.
Each pilot type has specific trainers. If you want to be an Alliance Pilot, you should talk to a Rebel Space Quest Trainer. These trainers are located in major cities on Tatooine, Naboo, and Corellia.
Space Quest Trainers will only train like-faction or neutral players. For instance, if your character is a declared 'Rebel', she will not be able to learn Imperial Piloting skills from an Imperial Space Quest Trainer, and vice-versa. Separately, if you acquire the Imperial Pilot novice skill box without being an overt Imperial (via Star Wars Galaxies' faction point system), you will not be able to learn Rebel or Privateer pilot skills until you 'Surrender' the Imperial Pilot novice skill box.
To surrender skills, open the skills window (CTRL+S by default), click on the skill you wish to surrender and then click the 'Surrender' button. You will be asked to confirm the removal of the skill.
Finding your Space Quest Trainer
* Travel to Tatooine, Naboo, or Corellia. (NOTE: There are no beginning Space Quest Trainers on any planets other than Tatooine, Naboo and Corellia. If you are not on one of these worlds, you will not be able to search for them using the planetary map as described below).
* Open the planetary map (CTRL+V by default).
* Locate the "Trainers" tab on the right-side pane of the planetary map interface.
* Double-click "Trainers" to open a list of trainer categories.
* Double-click "Pilot" to expand the list of specific NPC Space Quest Trainers (you can also double-click "Shipwright" to expand the list of specific NPC Shipwright Trainers). Each Space Quest Trainer's name and factional affiliation will appear here.
* Right click on the Space Quest Trainer that interests you.
* Select "Waypoint" from the menu that appears when you right-click. This will create a waypoint in your datapad.
* Close the planetary map window (CTRL+V by default).
* Activate the waypoint to your quest trainer by opening your datapad (CTRL+D by default), selecting the 'Waypoints' tab, and right-clicking on the waypoint object that you just created. The waypoint object will bear the name of the Space Quest Trainer by default. Choose 'Activate' from the right-click menu.
* Close the datapad (CTRL+D).
* Follow the waypoint indicator - the blue arrow on your radar - to your trainer. As you near the waypoint, it will become visible as a beacon of bluish light on the horizon.
Gaining your first Pilot Skill box
To gain your first piloting skills, you'll need to talk to your Trainer. You can automatically start a conversation by double-clicking on the Trainer or using the radial menu and choosing the "Converse" option. Note that you will not need to surrender any skill points to become a pilot.
Once you've started a dialogue, follow the conversation options to sign up for your Novice Piloting skill box.
Upon receiving your Novice Piloting skill box, you'll earn at least one starship certification (which gives you "license" to pilot a specific type of ship) and your "starter ship.
You can also receive your first mission from your Space Quest Trainer.
Your Starter Ship
All novice Space Quest Trainers have the ability to provide you with a starter ship. You can see this ship in your datapad (CTRL+D by default). The "starter ship" is a low-powered vessel suitable for rookie pilots.
If you don't have a ship in your datapad, converse with your original Space Quest Trainer to acquire a new starter ship.
Starter ships are intended to get you into space (and combat) right away. However, you will not be able to upgrade your starter starship. Only those ships built by Shipwrights (other players) can be upgraded. Eventually, you'll want to buy such a ship from another player.
4: Missions & Combat Basics
The life of a starfighter pilot revolves heavily around completing missions for his or her factions. Rebel Alliance pilots are called upon to make the galaxy safe from Imperial tyranny by patrolling the galaxy, running escort duty, and, of course, battling Imperial forces wherever they might threaten peace and freedom. Under order from the Emperor, Imperial pilots are constantly on the hunt for pirates, smugglers, illegal mercenary groups, and Rebels. Privateers, meanwhile, might run missions to protect Jabba the Hutt's smuggling lanes or chase pirates from the Naboo system.
Regardless of the type of pilot you decide to become, you'll earn credits, experience, faction standing, and the ability to advance in your chosen profession by completing missions of various types.
While a simple patrol mission sounds easy enough, traveling into space can be exceedingly dangerous. When undertaking virtually any mission, you should expect to encounter some enemy forces. You must be ready for combat at all times.
This chapter covers both the mechanics for taking and completing missions, getting into space, and destroying your enemies.
Receiving Your First Mission
As soon as you have your Novice Piloting skill box, you'll be eligible to begin flying missions for your Trainer. To receive your first mission, talk to your Space Quest Trainer by double-clicking on him or her and then follow the conversation options.
To complete the mission, you'll need your starter ship. If you do not already have a ship review the "Your Starter Ship" section in Chapter 3.
Launching your starship
Every mission will be issued by a Space Quest Trainer will required that you head into space (and usually a specific area of space). To launch your starship:
- Go to the nearest Starport. Walk inside and locate the "Starship Terminal."
- Right-click on the terminal to bring up the radial menu.
- Choose "Launch Starship" to go directly to space.
Note that your ship must be relatively intact in order to launch. If you are missing critical components or if those same components (like your engines) are badly damaged, you will not be allowed to launch. You must outfit your ship with working equipment. Since this is your first mission, your ship should be intact.
Attempting Your First mission
Your first mission will be a simple patrol that requires you to fly to several waypoints n space. The waypoints will appear on your radar as pulsing white triangle, on your HUD as white arrows, and actually in space as glowing beacons of light. Once you pass through a patrol waypoint, your mission will update and you'll receive the next patrol point.
But, be warned: it's likely your patrol will be met with violent disruption. You'll have to think fast and shoot straight to survive. See below to learn the basics of combat.
Basic Flight Controls
Mouse: Control heading
Mouse 1: Fire primary weapons
Mouse 2: Fire secondary weapon
Mouse Wheel: Zoom in/out
'W' / Up arrow: Increase speed setting
'S' / Down arrow: Decrease speed setting
'Q' / Left arrow: Roll your ship counter-clockwise
'E' / Right arrow: Roll your ship clockwise
'A'/Numpad 1: Yaw left
'D'/Numpad 3: Yaw right
TAB: Cycle through targets
Mouse heading control
You can control your ship heading with the mouse. If you move the mouse away from you, your ship will lift; if you move the mouse to the right, the ship will turn to the right.
When using the Mouse, you will receive a "virtual joystick" indicator on your ship's Heads-Up Display (HUD).
As you move the mouse, this indicator changes position to show how fast you will turn in the desired direction. The further the indicator is from the center of your screen, the faster you will turn. Put the cursor in the center of your viewscreen to stop turning.
Basic Combat
In most cases, combat is simply a matter of being able to line up your target in your targeting sights and opening fire at the right time.
To cycle through all targets in your immediate area, use the TAB key (default). Additionally, you can use the comma (,) and period (.) keys to cycle through nearby enemy targets.
A targeted enemy will show up as a blue arrow on your HUD. Follow the arrow until you have the targeted starship in your field of view. When you're ready to attack, open fire by hitting the appropriate mouse or joystick button.
To hit your target, try to aim for the small bright circle just in front of the ship's movement. This indicator shows the enemy ship's trajectory and will help you "lead" your target as it zooms away.
Becoming an Ace pilot takes practice, but here are a few hints that might help you survive your first few encounters...
* Lead your target. Especially when your target is at a distance, fire your shots just in front of the enemy ship. As the ship moves, it will actually fly into your line of blaster fire.
* Tail your enemy. One of the most effective tactics is dropping in behind your enemy and sticking to his afterburners. This keeps you safe from return fire and you can concentrate all your fire on one set of shields. It's not always easy, especially if you're trying to tail an agile A-wing, but it's a tactic you should master.
* Manage your speed. If you're in a speedy starship, like a TIE fighter, you might want to throttle back and slow down so you don't continually fly past your enemy. A TIE fighter tailing a Y-wing might only need to fly at half-speed to keep the Y-wing in its sights.
* Watch your back. Enemy pilots know some of the same tricks you do and will try to slip in behind you whenever possible. Keep an eye on your radar for approaching hostiles, especially when you're on a straight trajectory towards a waypoint. If you spot space vermin sneakin' up on you, turn and blast them.
* Spinning is a good trick. Liberal use of rolls can help shake enemy fighters and keep them from peppering you.
* Slam on the brakes. If you have a fast-moving enemy right on your tail, you might be able to trick him into buzzing past you by making a sudden stop. If this trick works, you'll find yourself looking into your enemy's engines and can start tailing him.

This month in Star Wars Galaxies the Galactic Civil War explodes into space! Get ready to join in epic space battles as you fight alongside or against Ace pilots such as Darth Vader, Luke Skywalker, or Boba Fett!
Combat has heated up in the space above Tatooine, Corellia, Naboo, Lok, and Dantooine, and the Rebellion and the Empire are scrambling capital ships to bring a decisive end to the conflicts. Defend your capital ships or attack the opposing faction's capital ships to turn the battle to your side! Show your dedication to the cause and earn new craftable ships, including the T-Wing, the H6-Scurrg, and the Tie-Defender, space components, and more! Additionally, you can earn tokens for your efforts in space that can be used with new vendors located on Talus and Rori.
You won't want to miss new NPC duty missions, now available from many of the new space stations. Challenge the best NPC pilots in the galaxy. But, watch out! Some of these new missions may have an Ace pilot gunning for you!
Whether you've sworn to fight for the Rebellion and freedom in the galaxy, or whether you've sworn to uphold the strength of the Empire, the Galactic Civil War has never been so fierce, so explosive, and your side has never needed you more. Pilots – to your ships! Galactic Civil War 2 – Space is here!
Game Update 20: Galactic Civil War 2 - Space
The Galactic Civil War expands into space! With this update, you will now be able to participate in dynamic space battles and fight alongside or against Ace pilots including: Darth Vader, Luke Skywalker and Boba Fett.
Defend your capital ship or attack the opposing faction's capital ship in an epic space battle!
Enjoy rewards like: new craftable ships, space components, and more! Tokens earned from the space battle can be used with new vendors located on Talus and Rori.
New NPC duty missions are available from many of the space stations. Challenge the best NPC pilots in the galaxy. But, watch out! Some of these new missions may have an Ace pilot gunning for you!
GCW2
Capital ships of either faction will now spawn in the space zones of Tatooine, Corellia, Naboo, Lok and Dantooine.
Each of the stations will come under attack every three hours.
Each zone will alternate between requiring the player to be Combatant or Special Forces.
Participation will be based on the player ship having killed at least one NPC ship or shot the enemy capital ship at least once.
Players cannot damage the components or the chassis of the capital ships and stations. Only another capital ship / station can cause chassis damage in the battles.
Players can cause shield and armor damage in addition to attacking other fighters. Players can support the fight by reducing the shield and armor from the opposing ship in addition to preventing opposing ships (player and NPC's) from attacking the friendly capital ship.
POI's for the space battle has been added to each system.
Added /spacebattlestatus command. The command can be used to get the time until the next space battle in the current system. You can get the time for other zones by adding the zone name after the command (for example /spacebattlestatus dantooine will give you the time until the next space battle in Dantooine space.
Players will be rewarded with tokens and GCW for participating in the battles. Winning the battle and participation in Special forces battles will provide a bigger reward.
A Rebel space token vendor can now be found in the Rori Rebel Military Outpost.
An Imperial space token vendor can now be found in the Talus Imperial Military Outpost.
Both vendors will sell new craftable ships, ship deeds, components, and other items.
Ship schematics will cost 300 tokens while the ship deeds will cost 1000 tokens.
Ace pilot collections have been added.
GCW
Invasion generals of both sides will now always use 64m ranged rifles.
The amount of GCW earned when a factional base is destroyed will be reduced for each extra player, if more than eight players are eligible for the reward.
For example if a group of players are destroying a base worth 2000 GCW points and there are 1-8 players eligible to receive the reward each will get the full 2000. If there's 10, each will get ((2000*/10) = 1600.
Space
You will no longer appear as a red dot to others during the grace period while loading into a space zone. If you are the one loading into the space zone, after you have loaded in, during the brief period before the grace period expires, you will not see others as red dots either. Everyone will go red dot at the same exact time when the grace period expires.
Damage taken by POB's in PvP has been reduced.
When hit by 100 pts of damage, Fighters take 50 pts in PvP. (50% reduction)
When hit by 100 pts of damage, a POB ship takes 25 points of damage. (50% * 50%)
When hit by 100 pts of damage, a gunship takes 12.5 points of damage. (50% * 25%)
Removed Imperial Lancer and Nebulon Frigate from Kessel Space.
Increased the size of the collision sphere on the JSF to match the Grievous Starship.
The Rihkxyrk Style 1, 2, 3, and 4 ships now use a cube collision instead of a sphere.
Changed the collision for the Ixiuyen ships to use a cube instead of a sphere.
Tier 7 Factional Duty missions are now available from Space Stations.
The tier 7 Duty Missions will spawn an Ace pilot during the boss rounds.
The T86 Shooting Star and the Kuat Engineering Systems TC-62 Engines should now appear correctly on the KSE Firespray.
High tier NPC Y-Wings should now correctly use their turrets.
The speed of the YE-4 gunship has been slightly increased.
Space ships have new loot drops including a shield, gun, engine, and reactor.