
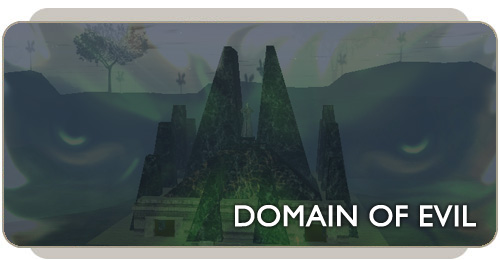
"That place... is strong with the dark side of the Force. A domain of evil it is. In you must go." - Yoda
Exar Kun was a Jedi who found himself drawn inexorably toward the dark side of the Force. The story of the Sith Lord begins thousands of years before the Galactic Civil War, but his legacy still lives on.
Path to the Dark Side
Exar Kun began his Jedi training under Jedi Master Vodo-Siosk Baas. Clashes with his fellow students on Dantooine ended in a violent confrontation, showing hints of the dark side influencing Exar Kun's emotions even at this early stage in his training. Kun also studied the history of the Sith, Force-wielders devoted to the dark side.
Kun's impatience to learn more about the Force took him away from his studies on Dantooine. As he traveled the galaxy, he encountered the spirit of the Dark Jedi Freedon Nadd.
The spirit of Nadd exerted his influence and Exar Kun turned to the Sith and the dark side of the Force.
The Massassi
Freedon Nadd told Kun of Yavin 4, where an ancient Sith Lord had once conducted terrible experiments on the lifeforms inhabiting the jungle moon. On Yavin 4, Kun was attacked by the Massassi, descendants of the creatures created by the Sith Lord's experiments.
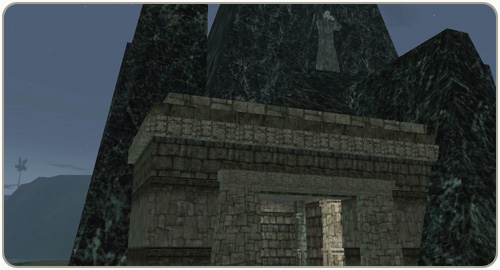
After Kun survived their attack by unleashing the power of the dark side, the Massassi accepted him as their leader. Exar Kun enslaved the abominations and forced them to construct temples of an ancient Sith design. These temples were built to focus the great energy of the dark side on Yavin 4.
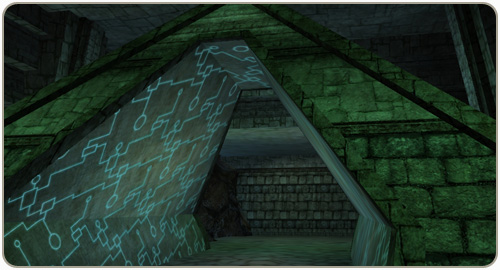
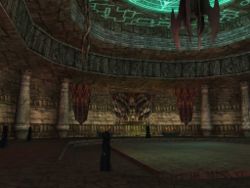
One of the temples on Yavin 4 became Exar Kun's personal retreat. An imposing statue carved from black stone rested on top, towering over anyone who approached the temple.
Exar Kun studied Sith alchemy, creating horrific creatures on the moon of Yavin 4 with his experiments.
The Sith War
Exar Kun eventually left the jungle moon for Cinnagar, where he encountered the dark Jedi Ulic Qel-Droma, who became his Sith Apprentice. The master and apprentice disappeared over the next several years. Exar Kun established the Brotherhood of the Sith during this time.
The Jedi Council, concerned about this growing threat, sent Kun's former master Vodo-Siosk Baas to speak with the Sith Lord. Exar Kun struck down the Jedi Master, and Vodo-Siosk's death sparked the Sith War.
The Jedi Knights battled the Sith in one of the bloodiest wars the galaxy would ever know. The war culminated in a battle on Yavin 4, where the Jedi Knights destroyed many of Kun's temples. Exar Kun, in a last effort, drew upon the life force of every Massassi. When his physical body was destroyed, his spirit lived on in the temple.
Exar Kun's essence remains trapped in his temple on Yavin 4. The Dark Lord of the Sith is far from powerless, and he bides his time in his domain, waiting for just the right opportunity to return.
Hidden Underground
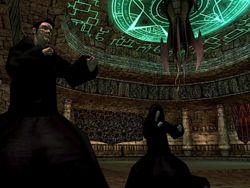
The mysteries of Exar Kun remain hidden even today as the evil buried there continues to seethe, waiting for a chance to rise once more… maybe sooner than expected. Currently, as the Galactic Civil War continues to rage, Rebel forces have moved into the Temple of Exar Kun. A team of archaeologists has been searching the remaining temples on Yavin 4 to find lost Sith artifacts. While exploring the Temple of Exar Kun, the team stumbled upon undiscovered catacombs hidden deep underground. What will they discover in the depths of the temple? Find out in an exciting new heroic encounter coming in Chapter 9!
You need to finish the Controlling Spirit Pre-Quest. To enter this instance, go to the Archeological Dig Site or you can use Aurilia Travel service. Buffs needed for Kinetic and Fire DOT damage. If you get killed, you can clone and come back. Make sure all group members properly enter the rooms! Recommended are: 2 Jedi - 2 Medics - 2 Commandos - rest can be e.g. 1 Officer & 1 Bounty Hunter tank are useful on phase 5.
Phase 1: The Open Hand of Hate (TOHH)
"TOHH is like fighting a mirror - the more dmg you deal, the more dmg you get"
 | Part One - taking out the cultists Jedi/Commando will attack TOHH (avoid specials/focus on basic attacks/healing with the medic support). Kill the 8 "Exar Kun Cultists", one at a time, as fast as possible. Green Energy bolts (with Static Shock) are being shot from the ceiling. If you receive the de-buff "Static Cling" ("Electrified icon"), they will target you. |
 | Part Two - taking out TOHH Group will take damage proportional to their DPS output on TOHH. Only use basic DPS weapons, without elementals. Group members with "Shared Pain" ("Base of Operations icon") de-buff will receive an amplified amount of damage. Group stops shooting until the Medic heals the de-buffed/low health player. Keeping an eye on the group! COMMANDOS might use different elemental Heavy Weapons without specials though. |
Phase 2: The Minder of Weak Wills (MWW)
 | Have your a Jedi aggro & a Commando attack MWW with position secured/AOE/Plasma mines as tomb flier bats & skreegs will spawn. Stasis the skreeg "Mother Luresh", and everyone focus on the bat "Vin'rith". MEDICS: Use "Cure Affliction" as soon as you spot this on a group member. Just fire everything you have on the final boss (activates a collection). |
Phase 3: The Caretaker of Lost Souls (COLS)
The Caretaker of Lost Souls (COLS) is in the center. The Executioner (Exec) towards the right - go and stand near him. You will also see upon the platforms at either side of the room, 4 Caretaker Protectors (protectors).
 | Part One - CPT A Jedi will aggro COLS, to start the instance. The entire group should stand near the Executioner. NEVER enter the central square of the room. 3 NPC's will spawn: Calming Influence (C) Pain Bringer (P) Tomb Guardian (T) Jedi, BH or Commandos should pick up the aggro of them. All focus on one NPC at a time, kill C, then P, then T as fast as possible. Then you will get a yellow system message - indicating the Executioner is "live" and attackable. |
| | He will move slowly around the room towards the prisoners. When he's down to roughly 1/6th health, he will reset and go back to his starting position, should he reach a prisoner, he'll kill the prisoner. 4 dead prisoners = instance fail. Once you've stopped Exec, a Protector will become attackable - someone will have to aggro him with a ranged weapon which will bring him towards the group. |
| As you're killing your first Protector, CPT will spawn again. If you have enough DPS, you should be able to kill them before the Exec becomes active again. Then you'll get a second Protector become attackable. You'll have CPT spawning whilst the Exec is active - which is dangerous as your group will be getting hurt, but you'll have to focus on stopping the Exec so as not to fail the quest. After your 4th Protector is dead, you are done with the Executioner, and on to the main boss. Do not attack the 4th Protector, wait for the CPT spawn to come, kill them first, then the Protector. It means you have less to worry about on the next section... | |
| | Part Two - taking out COLS When the 4th Protector dies, you will see some green gas emerge in the centre of the room. It will spread from the centre towards your group – aiming for the group. The entire group MUST follow the Medic around the room BASICALLY standing on top of him all the time. Decide in advance the direction! Walk slowly around the room and it will never catch you up. It lingers in place. BUT if someone run around the room too fast, they would catch it and the green gas is instant death... COLS should now be attacked with auto-fire/auto-target. He has a number of special attacks that will hurt: Vengeful Aura (kinetic AoE ~1k damage) Lifesap (electrical 5k+ damage) Energy Storm (electrical 5k+ damage) Break of Kun Once your team has sychronised their walking around the room, keep a constant DPS going. It'll take a while to kill COLS, but if your full group has managed to survive to this point, you shouldn't struggle. |
| Phase 4: The Clenched Fist of Hate |
| Part One - Tomb Guardians You'll encounter 6 Gold Tomb Guardians to kill before you reach the boss. You can take them on 2 at a time, no problem. You will cross a bridge to reach the final 2 Tomb Guardians, then you'll see the boss. |
Part Two - The Clenched Fist of Hate (CFH) |
| Phase 5: The 4 Horsemen |
| Lingering Harmony (outside left) & (outside right) Embraced Chaos - MELEE RANGED ATTACKS WILL BUFF NPCs, 2 players stands still and aggro them. Play tennis with the 2 NPCs, hitting whichever one runs towards them. The bosses don't hit too hard.Now - if either Harmony or Chaos die long before the other one does, you will find that you're doing very little damage to the remaining boss. The debuff you have will say he's mitigating 100% of your damage. Stop attacking. It will take 2 minutes for the debuff to wear off. It will quickly re-built to 100% but by this time it’s likely you'll have dealt enough damage to kill of the boss. |
Unquenchable Wrath (inside right) - RANGED MELEE ATTACKS WILL BUFF NPCs, A Tank will aggro Wrath with Ranged attacks and an elemental ward will appear on his toolbar and yours; The Elementals Fire, Cold, Acid or Electricity will be active 10 seconds. Use whatever specials you like as long as you're using the corresponding elemental weapon. After 5 seconds the NPC's toolbar flashes what the next ward will be. 1st Medic focuses on healing the tank but can also do the weapon switch along with tank. 2nd Medic will heal others and rez tank/medic, don’t forget Stasis on the Boss before. Its crucial this part is done correctly, because if not, the NPC does 40,001 damage to whoever has his aggro! Once the boss has lost 1/4th health, others can join in to help speed up the process. |
| Promised Vengeance (inside left) - RANGED The group will DPS Promised Vengeance with ranged weapons. Melee hit will give him a huge buff. The group should use specials but need to be very careful with AoE. After he is killed, begin attacking Unquenchable Wrath and no need to worry about elemental weapon usage. |
| Phase 6: Wordbearer |
| The Exar Kun Wordbearer will spawn hitting really hard and using area attacks. Everyone but the tank should go up on the stage and use ranged weapons. Tank should keep him aggro’d! If you are on the stage you don't have to worry about the green "static shock" energy circles. At about 1/8th health, he'll de-spawn. |
| Phase 7: Massassi Blade & Exar Kun |
| Exar Kun will spawn and a floating Massassi Blade will spawn. Have the group fire everything they have, kill the Blade first then Exar Kun. Neither is of much trouble. |
| The Exar Kun Heroic Reward and Loots: Exar Kun Token of Heroism (bonus of +1 to Evasion Chance) |
| |
Friday Feature - 09/14/2007

Chapter 7 will re-introduce some familiar faces of evil to the universe of Star Wars Galaxies. Axvka Min and IG-88 are just two of the cunning and powerful opponents players will confront. High level challengers will have to band together to have any hope of defeating these malevolent foes. Get to know the opponents you will face in the heroic encounters of Chapter 7. Axkva Min
The Nightsisters, often called the witches of Dathomir, are Force-wielding warriors descended from the exiled Jedi Knight Allya. During the era of the Old Republic, Allya was sent to Dathomir by the Jedi, who hoped that she would turn away from the dark side in time. Allya thrived on Dathomir using the Force to tame the wild rancors and hunt prey for food, and as time passed her descendants formed into clans.
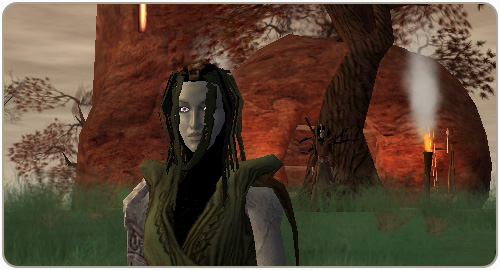
One such clan, the Nightsisters, embraced the dark side of the Force. Many of the Nightsisters chant, sing, and cast spells to utilize the "magic" of the Force.
Axkva Min is a Nightsister elder who discovered the art of draining the life force of her enemies to enhance her own power. With each life destroyed, Axkva's hunger only grew.
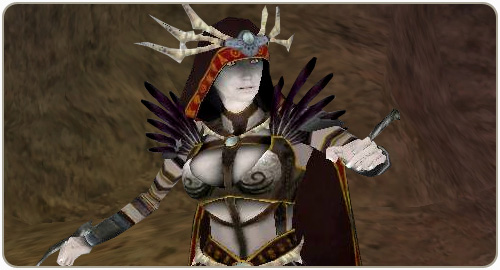
To afford a steady supply of powerful Force sensitive beings, she set up a personal training retinue, selected from the most talented of the Nightsister Spell Weavers. From this pool Axkva chose the most powerful pupils and sent them out to establish a presence for the Nightsister conclave across the face of Dathomir.
In truth, Axkva was consuming the life forces of these students and later disposing of the bodies when her needs had been fulfilled. When the scope of her atrocities was brought to light, Axkva Min drew the ire of the most powerful of the Nightsisters.
Axkva Min was banished and imprisoned in the dark underground tunnels of Dathomir. She remains a menace to all beings on the planet as long as she lives.